A Practical Guide to the Best Gravel for Driveways
A Practical Guide to the Best Gravel for Driveways
Let's be honest, finding the 'best' gravel for your driveway is about getting the balance right between looks, durability, and what's in your wallet. If you're looking for a straight answer, for most UK driveways, a 10-20mm angular crushed stone is your best bet. Think granite or something like MOT Type 1 aggregate. Its sharp, interlocking shape is the key – it creates a solid, stable surface that doesn't shift around and lets water drain away perfectly.
Choosing the Right Gravel for Your Driveway
Picking the perfect aggregate for your project isn't just about choosing a colour you like. It’s about creating a driveway that's functional, lasts for years, and genuinely boosts your home's kerb appeal. Get this choice right, and you’ll have a surface that can handle daily car traffic, stand up to the infamous British weather, and won't demand constant attention.
Think of it this way: your driveway is the very first thing people see. A well-chosen gravel surface gives you that satisfying crunch under the tyres and a clean, sharp look that just works. It's a practical and cost-effective solution that really delivers.
Key Factors to Consider
Before we jump into the different types of stone available, it's worth getting your head around the basic principles. Your decision will really boil down to three main things:
- Functionality: Does the gravel lock together to form a stable surface, or will it scatter everywhere the second a car drives over it? This is where angular stones are miles better than rounded ones.
- Durability: Can it take the weight of your vehicles without slowly turning into dust? Hard stones like granite and limestone are built for the job.
- Drainage: How well does it let rainwater soak through? Here in Dorset, with our famously wet climate, sticking to that 10-20mm angular gravel is crucial for stability and avoiding the soggy, waterlogged mess you get with the wrong materials. You can find more insights on aggregate performance over at mineralproducts.org.
A successful driveway isn’t just about the top layer you see. It’s an engineered system where every component—from the sub-base to the decorative stone—plays a crucial role in performance and longevity.
This guide will walk you through everything you need to know. We'll cover everything from comparing the different types of gravel to building a solid foundation and working out your costs. By the end, you'll have all the practical knowledge you need to pick the perfect aggregate for a driveway that’s both beautiful and built to last.
Comparing the Most Popular Types of Driveway Gravel
Picking the right gravel for your driveway is about more than just what colour you like the look of. It’s really about understanding how different materials stand up to the pressure of daily use. Get it right, and you'll have a stable, long-lasting surface. Get it wrong, and you could be looking at a messy, high-maintenance headache for years to come.
Let's break down the most common options you'll find here in the UK to make that choice a bit easier.
Think of angular crushed stone as the interlocking blocks of the aggregate world. Things like granite and limestone are put through a crusher, which creates sharp, jagged edges. When you spread this on a driveway, the weight of a car forces these edges to lock together, creating a firm, settled surface that doesn't want to move.
On the other hand, rounded gravel like pea shingle is more like a ball pit. Each stone is smooth and rolls around easily against its neighbours. While it looks lovely on garden paths, this stuff is usually a poor choice for a driveway—especially one on a slope. It just scatters everywhere and never feels stable under your tyres.
This visual guide can help simplify your decision, whether you're prioritising rugged durability for a high-traffic area or a specific look for a quieter home setting.
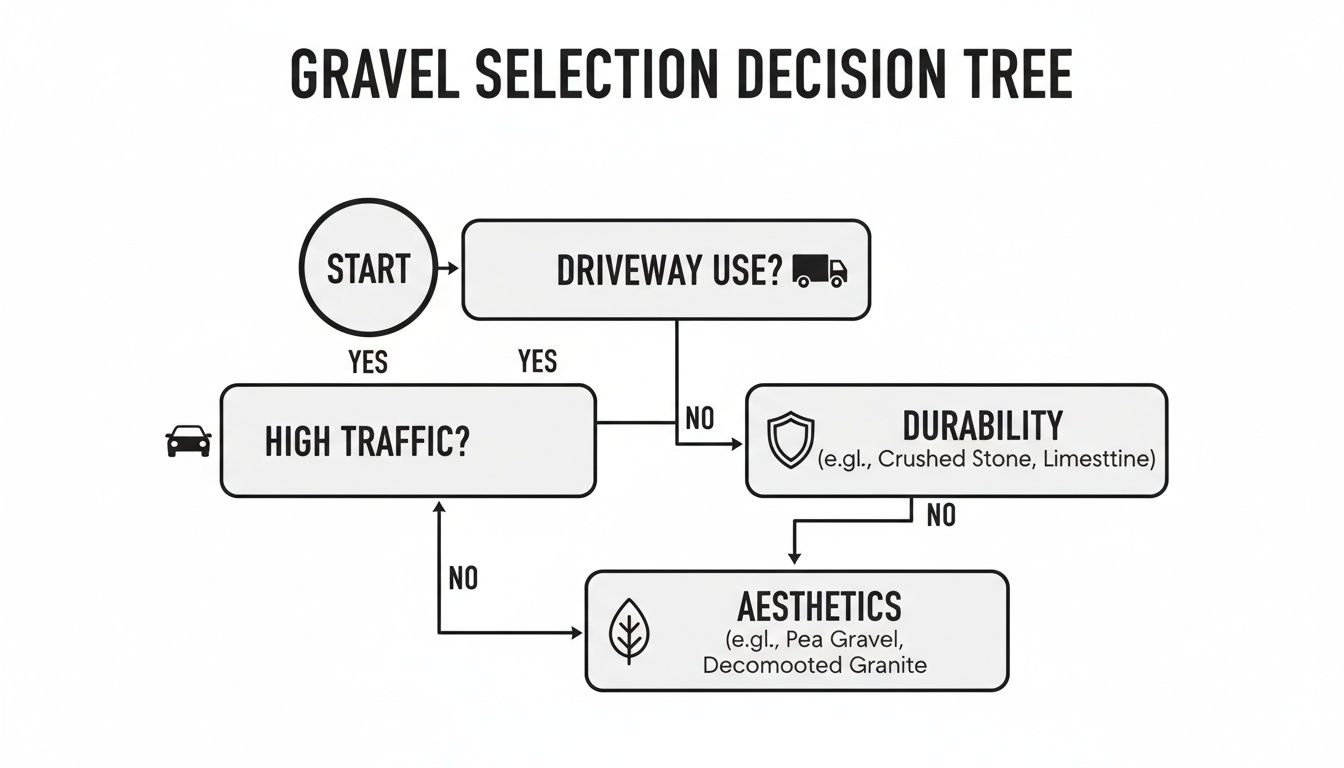
The key takeaway is pretty simple: function dictates form. Heavy-duty use needs a tough, interlocking stone, whereas lighter use gives you more freedom to choose something decorative.
The Workhorse Functional Aggregates
For the vast majority of driveway projects, performance has to come first. These aggregates are engineered to do a job, providing the stability and drainage that's absolutely essential for any surface that's going to have a car parked on it.
MOT Type 1 is the undisputed champion of the sub-base. It’s not actually one type of stone, but a carefully graded mix of crushed rock, from hefty 40mm pieces right down to a fine dust. This specific recipe allows it to be compacted into an incredibly dense and solid layer, giving your driveway the strong foundation it needs. You wouldn't use it for the decorative top layer, but its role underneath is non-negotiable if you want a professional result that lasts.
Crushed Granite is a fantastic choice for both the base and the final top layer. As an igneous rock, it's exceptionally hard and durable, so it can take the strain of heavy traffic without breaking down. Usually coming in grey or pinkish shades, its angular shape locks together brilliantly, creating a surface that stays put. A 10-20mm size is pretty much perfect for that top layer, giving you a great balance between stability and a comfortable surface to drive on.
The Popular Decorative Choices
Once that solid foundation is in, you can start thinking about the top layer that gives you the right blend of performance and appearance. These options are often chosen for their colour and texture, which can add some serious kerb appeal.
Limestone Chippings are a hugely popular option, known for their bright, clean look that can really lighten up the front of a property. Just like granite, this is a crushed, angular stone, so it compacts well to form a stable surface. Keep in mind, though, that limestone is a sedimentary rock and a bit softer than granite. This just means it might break down a little faster over many years of heavy use.
It's worth remembering the term 'gravel' can be a bit broad. In the trade, it usually means naturally rounded stone, whereas 'crushed stone' refers to the mechanically broken, angular stuff. For driveways, crushed stone is almost always the better performer.
Cotswold Buff gravel offers that warm, honey-toned finish that works so well with traditional and rustic-looking homes. It's a type of limestone chipping that's prized for its distinctive colour. You get all the same functional benefits of an angular stone with good drainage, but with a high-end, classic look.
Another really interesting material is self-binding gravel, which is a special mix of gravel, sand, and clay. When you compact and water it, it forms a firm, almost solid surface that's far more stable than loose chippings. This makes it a great choice for paths and driveways where you want the appearance of gravel without it shifting all over the place. You can learn more about its unique properties in our guide on self-binding gravel for pathways.
Gravel to Use with Caution
While some types of gravel look fantastic, they just aren't suited to the demands of a driveway. Knowing their limits is the key to avoiding problems down the line.
Pea Shingle is made up of small, rounded stones, usually around 6-10mm. Its smooth texture is comfortable to walk on, which is why it's great for paths, but on a driveway, it basically acts like marbles. Tyres will spit it out, it’s a pain to walk on, and it’s famous for getting stuck in your tyre treads. It's best to keep this one for decorative borders and leave it at that.
Why a Solid Foundation Is Your Driveway's Most Important Layer
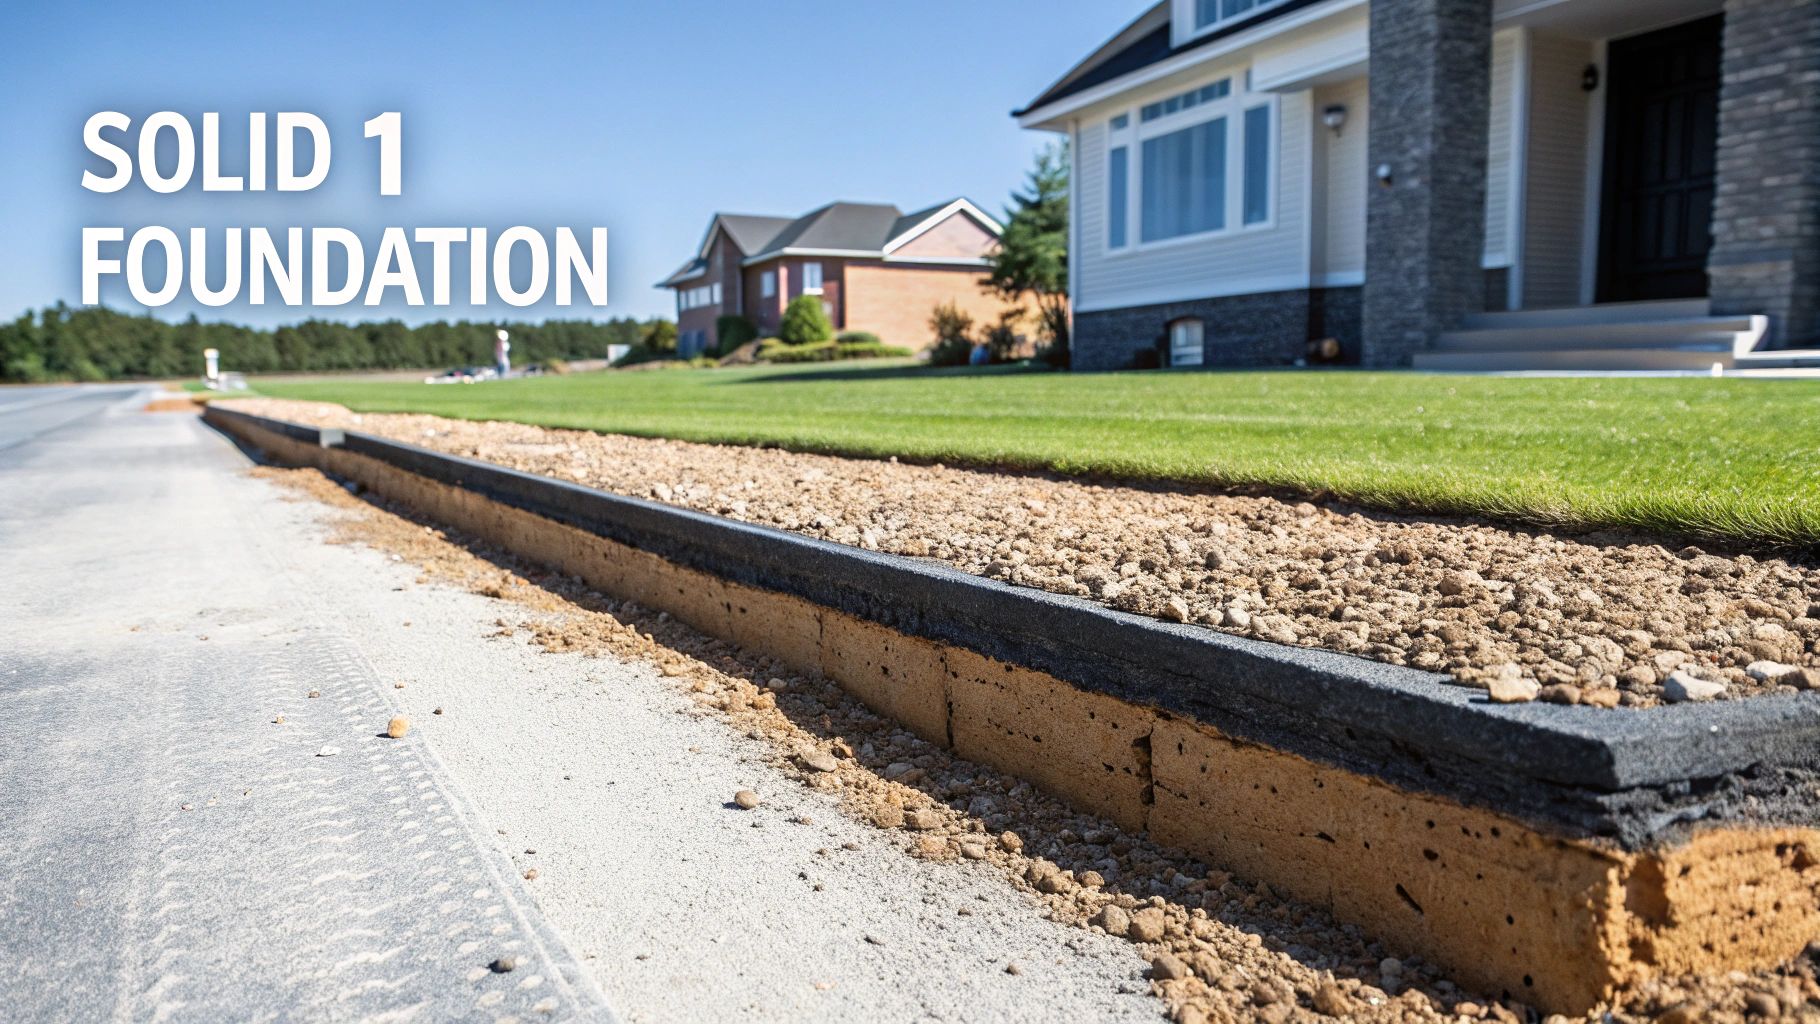
It’s easy to get caught up in the look of a new driveway—the colour and texture of the gravel are what everyone will see, after all. But the real secret to a driveway that looks great for years, not just a few months, lies hidden beneath the surface.
Without a properly built foundation, even the most beautiful decorative stone will quickly turn into a rutted, sinking mess. Think of it like building a house: you'd never dream of putting up walls on soft, unprepared ground. The exact same principle applies here. This unseen sub-base is the structural backbone of your entire project, and getting it right is non-negotiable.
The Unsung Hero: A Geotextile Membrane
Before a single stone goes down, the first thing you need to think about is a geotextile membrane. This is a tough, permeable fabric that you roll out over the excavated earth, and it acts as a vital barrier that will save you a world of headaches later on.
First, it’s a brilliant weed barrier, stopping stubborn plants from pushing up through your brand-new driveway. Just as importantly, it stops your expensive aggregate from being squashed down into the soil below as cars drive over it. This separation is absolutely key to preventing your investment from literally sinking into the mud.
Understanding MOT Type 1: The Ultimate Sub-Base
The undisputed star of any driveway foundation is MOT Type 1 aggregate. This isn’t just a random pile of rocks; it's a specific, engineered material designed for maximum strength. The "MOT" actually harks back to the old Ministry of Transport, which set the original standards for materials used in road building.
What makes it so good is its mix of particle sizes. It's made of crushed rock, usually granite or limestone, with pieces ranging from a chunky 40mm right down to a fine dust. This blend is the magic ingredient.
When you compact it with a wacker plate, the bigger stones lock together to provide the raw strength, while the smaller particles and dust fill every tiny gap. This process shoves out all the air pockets, creating an incredibly dense, interlocking layer that is both rock-solid and permeable enough for water to drain away.
Simply dumping gravel onto soil is a recipe for failure. A compacted MOT Type 1 sub-base provides the unyielding platform needed to support thousands of pounds of vehicle weight, day in and day out.
To learn more about its technical side, our guide explaining what MOT Type 1 aggregate is has all the details.
Proper Installation for a Bulletproof Base
Creating this solid foundation isn't just a case of spreading the aggregate around. It needs careful prep and methodical compaction to get a professional result that will last for decades.
Here’s a quick rundown of the essential steps:
- Excavation: You need to dig out the driveway area to the right depth. For a typical driveway, aim for a total depth of around 150-200mm (that's 6-8 inches).
- Laying the Membrane: Once the ground is level, roll out your geotextile membrane. Make sure you overlap any seams by at least 300mm to prevent weeds from sneaking through.
- Applying the Sub-Base: Spread a layer of MOT Type 1 about 100-150mm deep across the entire membrane.
- Compaction is Key: This is the most crucial bit. Using a wacker plate, go over the whole surface several times until the base is completely solid, level, and doesn’t move under your feet.
If you’re working with particularly soft or clay-heavy ground, it's worth looking into soil stabilization techniques to give your foundation the best possible start. A well-compacted sub-base is your best defence against the problems that plague poorly built driveways.
How to Calculate Project Costs and Material Quantities
Getting your budget and material quantities right is one of the most important steps for a smooth, stress-free driveway project. Nobody wants the headache of running out of gravel halfway through the job, or the sting of paying for a surplus you don't need.
The good news is, you don't need to guess. A few simple calculations are all it takes to get a crystal-clear picture of what your project will cost and exactly how much aggregate you'll need to order.
Budgeting for a Gravel Driveway
Planning your driveway budget doesn't need to be a complex affair. In the UK, gravel is a fantastic choice if you're looking for an attractive, durable surface that won't break the bank, making it a go-to for homeowners and tradespeople alike.
When you're figuring out your expenses, looking into how to reduce construction costs is a smart move to keep everything on track. Gravel driveways really shine here, typically costing between £60 and £100 per square metre. To put that into perspective, block paving a small 11.5m² area could set you back £1,000-£1,500, showing just how economical gravel can be.
Calculating Your Gravel Needs in Three Simple Steps
To make sure you order the perfect amount, you'll first need to work out the volume of your driveway area, then convert that number into tonnes. Most suppliers, including us at The Waste Group, sell aggregates by weight. Just grab a tape measure, a calculator, and follow these easy steps.
-
Measure Your Driveway Area
First up, measure the length and width of your driveway in metres. Multiply those two numbers together to get the total area in square metres (m²). For instance, if your drive is 10 metres long and 5 metres wide, your area is 50m². -
Decide on the Depth
Next, you need to decide how deep you want your gravel layer. For a standard top layer of decorative aggregate, a depth of 50mm (which is 0.05 metres) is perfect. This gives you great coverage without being so deep that it feels like you're walking on sand. -
Calculate the Total Volume
Now, just multiply the area by your chosen depth to find the total volume in cubic metres (m³).Formula: Length (m) x Width (m) x Depth (m) = Volume (m³)
Using our example: 10m (L) x 5m (W) x 0.05m (D) = 2.5m³
This simple sum gives you the exact volume of space you need to fill. The final step is turning this into the unit you’ll actually use to place your order.
Converting Cubic Metres to Tonnes
The last piece of the puzzle is converting your volume (m³) into weight (tonnes), which is how we sell gravel. Different materials have different densities, but a solid rule of thumb for most gravel or crushed stone is that one cubic metre weighs roughly 1.6 tonnes.
To work out how many tonnes you need, multiply your volume by this conversion factor.
- Calculation: 2.5m³ x 1.6 = 4.0 tonnes
So, for our 50m² driveway example, you would need to order 4 tonnes of gravel for the top layer. Don't forget, you'll need to do a separate calculation for your MOT Type 1 sub-base, as that needs to be laid much thicker (usually 100-150mm).
Driveway Material Cost Comparison Per Square Metre
To really see how affordable gravel is, it helps to put it side-by-side with other popular driveway materials in the UK. Gravel almost always comes out on top for the lowest initial cost while still delivering a robust, long-lasting surface.
Here's a quick look at how the numbers stack up.
| Material | Average Cost per m² | Typical Lifespan | Key Benefit |
|---|---|---|---|
| Gravel | £60 – £100 | 10-100+ years | Most cost-effective and excellent drainage |
| Resin-Bound | £100 – £160 | 15-20 years | Smooth, permeable, and modern appearance |
| Block Paving | £120 – £200 | 20+ years | Classic look with intricate pattern options |
| Tarmac/Asphalt | £80 – £140 | 15-20 years | Durable and provides a smooth, uniform finish |
This clear cost advantage, combined with its good looks and simple installation, makes choosing the best gravel for driveways a no-brainer for many homeowners. By calculating your needs accurately, you can budget with confidence and set your project up for success right from the very start.
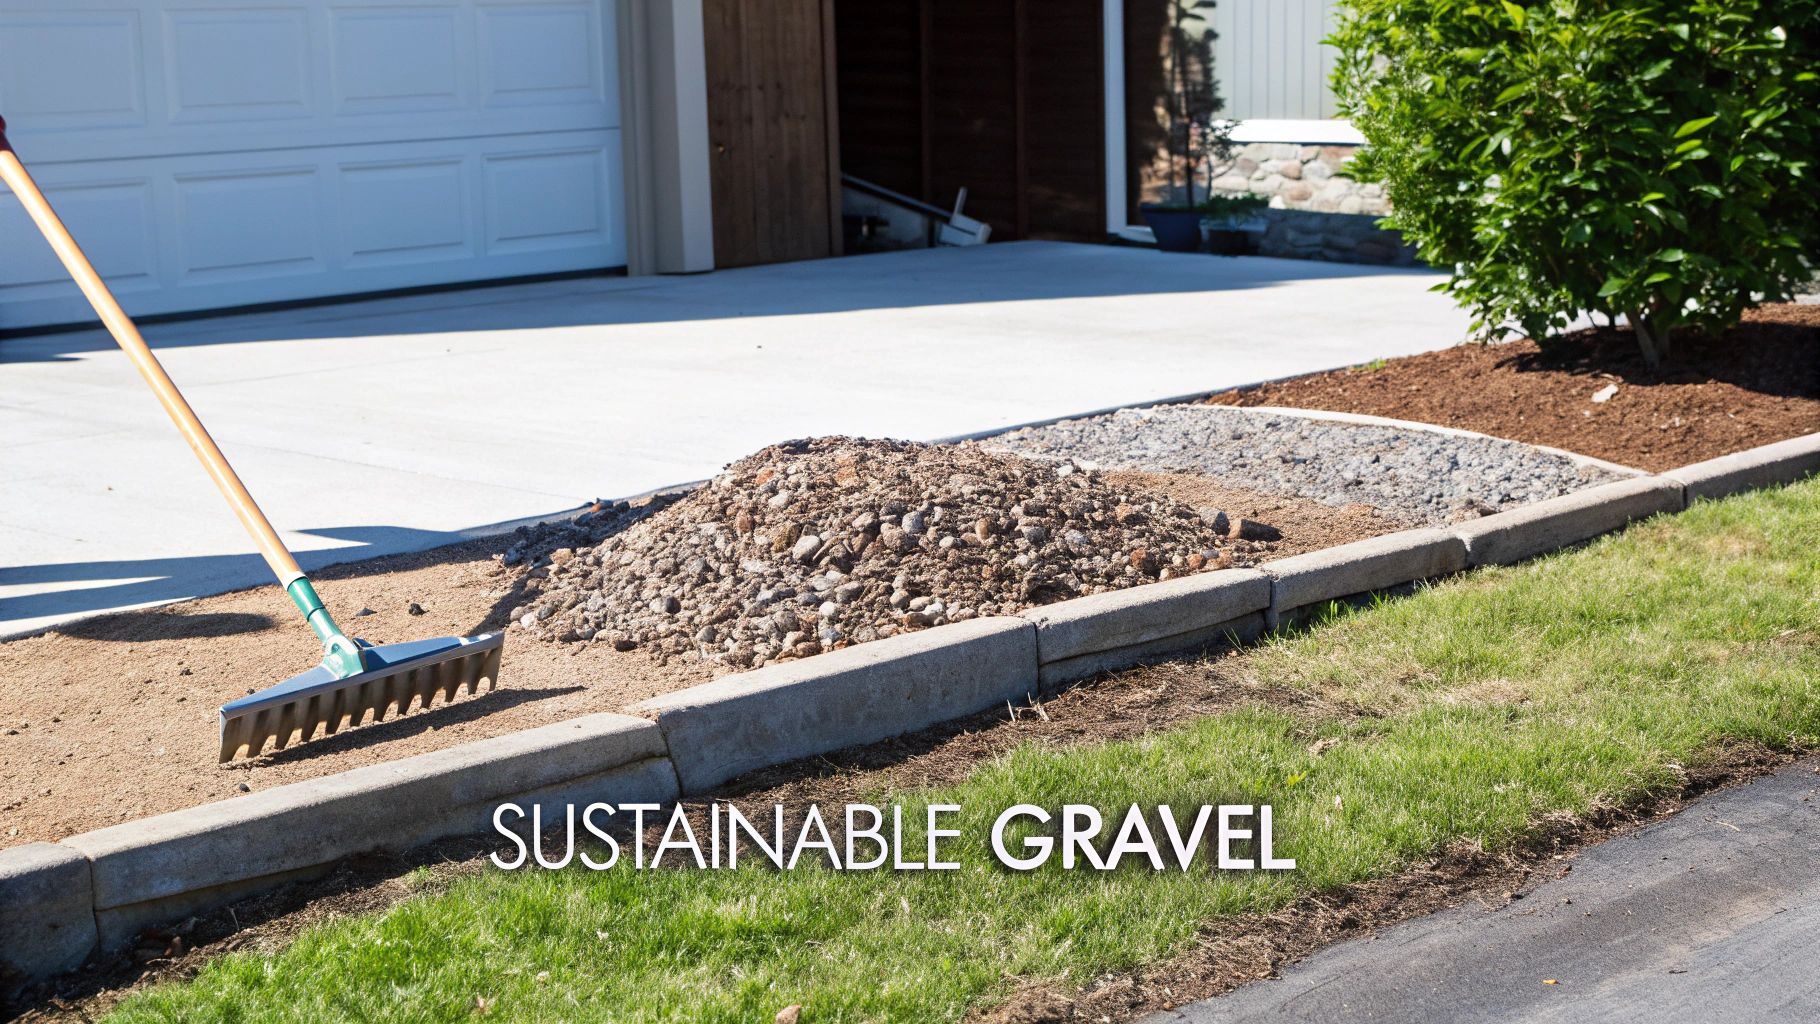
Sustainable Gravel Options and Long-Term Maintenance
Choosing the right gravel for your driveway goes beyond just looks and cost. It's a real chance to make a more environmentally friendly choice. With sustainability becoming a bigger and bigger deal in landscaping, it pays to know about the eco-conscious options out there.
At the same time, knowing how to look after your new driveway is the key to making sure it stays a durable, attractive feature for years to come. A little bit of simple, consistent care goes a very long way.
Embracing Eco-Friendly Recycled Aggregates
When you're mapping out your driveway project, give some serious thought to using recycled aggregates, especially for that all-important sub-base layer. These materials come from construction and demolition waste—think crushed concrete, old bricks, and reclaimed asphalt that get processed and graded into a top-notch product.
By choosing recycled aggregates, you’re directly reducing the need to dig up brand new stone from quarries, which lessens the environmental toll of extraction. It also keeps a massive amount of waste out of our landfills, helping create a more circular economy in the building industry.
The UK has made impressive progress here. Recycled and secondary aggregates now account for 74.3 million tonnes, meeting 31% of the country's huge 240-million-tonne yearly demand. It shows a strong national push for greener building, and you can learn more about these efforts from the Mineral Products Association.
Recycled MOT Type 1, for instance, performs just as well as the quarried version when it comes to compaction and strength. This makes it a fantastic and responsible choice for your driveway's foundation. You can dive deeper into how it all works in our guide on the recycling of aggregates.
Simple Routines for Long-Lasting Driveways
One of the best things about a gravel driveway is just how low-maintenance it is. Unlike tarmac or concrete that can crack and stain, gravel is much more forgiving and a doddle to look after. Don't think of it as a chore, but as a small investment to keep your driveway looking great for decades.
Just a few simple jobs every now and then are all it takes to keep things in perfect nick.
A well-maintained gravel driveway is a living surface. A little attention every now and then prevents small issues from becoming big problems, ensuring it looks and performs its best year after year.
Here are the three main tasks you'll want to stay on top of:
-
Occasional Raking: Over time, car tyres can create little dips or move gravel around. A quick rake-over with a sturdy landscape rake every few months is all you need to level everything out again. It fills in any low spots and keeps the whole surface looking fresh and tidy.
-
Topping Up Every Few Years: Even on a perfectly laid driveway, a bit of gravel will get displaced or crushed down over the years. To keep that ideal 50mm depth, plan on adding a thin top-up layer every 3-5 years. It’s a simple refresh that brings back that full coverage and satisfying crunch underfoot.
-
Effective Weed Control: If you put down a good quality geotextile membrane when you built the driveway, weeds should be a rare sight. However, the odd airborne seed might still try its luck in the top layer. Dealing with them is easy—just pull them by hand or use a suitable weed killer to keep the surface clear.
Getting Your Delivery Sorted: A Practical Checklist
You’ve picked your gravel and worked out the quantities. Brilliant. The last piece of the puzzle is getting all that aggregate onto your property without any drama. A bit of forward planning now will save you a world of headaches on delivery day, making sure your project gets off to a flying start.
First things first, play the role of the delivery driver. Walk the route from the main road to where you want the gravel dropped. Our grab lorries and tippers are big vehicles and they need a surprising amount of room to manoeuvre. Look out for low-hanging tree branches, tight corners, or narrow gates that could cause a problem. A clear, easy path is an absolute must for a smooth delivery.
Next, pinpoint the exact spot for the drop. Think about access – you don't want a giant pile of gravel blocking your car in or getting in the way of other tradespeople. A top tip from the pros: lay down a large, heavy-duty tarpaulin first. It makes the final clean-up a doddle and stops your lovely new stone from getting mixed up with mud and grass.
Finalising the Order and Prepping for the Big Day
Once you’re happy with the access route and you've got your drop zone sorted, it’s time to place your order. Any decent supplier will chat through delivery times and the type of vehicle they’ll be using, making sure it all works for you.
Here’s a quick list to tick off:
- Confirm Access with Your Supplier: When you ring up, give them a heads-up about any potential tricky spots. They’ll be able to tell you if a standard lorry will get through or if you might need a smaller vehicle.
- Prep the Drop Zone: Get your tarpaulin laid out or the area cleared the day before. It’s a small job that saves a huge amount of effort later on.
- Chat to Your Contractors: If you've got landscapers coming in, let them know when to expect the delivery. That way, they can be ready to get cracking the moment the materials land.
Planning the delivery with the same care you've put into choosing your gravel is what separates a smooth project from a stressful one. It’s the final step to getting the job done right.
The Three Golden Rules for a Great Driveway
We’ve covered a lot of ground in this guide, but if you only remember three things, make them these. They’re the key to a professional-looking and long-lasting result:
- Choose the Right Stone: For a driveway that can handle daily use and stay put, a 10-20mm angular crushed stone is always the best bet.
- Build on a Solid Foundation: Don't even think about skipping the geotextile membrane and a properly compacted MOT Type 1 sub-base. This is non-negotiable.
- Measure Twice, Order Once: Use the simple formulas to get your tonnage right. It’ll save you money and stop you from having a pile of leftover stone at the end.
Armed with this knowledge, you're all set to give your property a real facelift. The next step is to make it happen. Get in touch with us at The Waste Group for a competitive quote and we’ll arrange a fast, reliable delivery of top-quality aggregates straight to your site.
Common Questions About Driveway Gravel
Getting your head around the world of aggregates can throw up a few questions. To help you get your plans finalised with total confidence, we’ve put together some straightforward answers to the queries we hear most often about choosing the best gravel for driveways.
What Is the Best Size Gravel for a Driveway?
For the vast majority of driveways here in the UK, an angular gravel somewhere between 10mm and 20mm is the perfect sweet spot. It’s the ideal balance – large enough so the stones won’t get lodged in your tyre treads, but still small enough to pack down into a surface that’s comfortable to drive and walk on.
What’s really important is the shape. The angular, interlocking nature of crushed stone in this size range means it locks together tightly under pressure. This creates a stable surface that isn't going to shift about every time you turn the wheel, something you just don’t get with smaller, rounded options like pea shingle.
How Deep Should a Gravel Driveway Be?
A properly built gravel driveway needs a total depth of around 150mm to 200mm, which is about 6-8 inches. This depth isn't just one big pile of decorative stone; it's a two-part system designed to give you maximum strength and a lasting finish.
Here’s how it’s usually built:
- Sub-Base Layer: This is the structural foundation. A solid, compacted layer of MOT Type 1, roughly 100mm to 150mm deep, provides all the strength and load-bearing capacity.
- Top Layer: This is the bit you see. A final decorative layer of your chosen gravel, about 50mm deep, provides the aesthetic finish and the surface you’ll drive on day-to-day.
Will Gravel Wash Away on a Sloped Driveway?
That’s a very common worry, and the honest answer is: it all comes down to the type of gravel you choose. Round stones like pea shingle are notorious for washing away on even a gentle incline because they just roll over each other.
However, angular crushed stone is a much better bet for slopes. Its jagged edges interlock securely, creating a far more stable surface that stands up to gravity and heavy rain. For really steep driveways, a plastic gravel grid system is the ultimate solution. These create honeycomb-like cells that hold the aggregate firmly in place, stopping any movement whatsoever. Finding the right materials is key; with just 141 extraction firms in the UK, partnering with a versatile supplier ensures you get a reliable supply for your project. You can learn more about driveway material costs and supplier availability.
Ready to get your project started with confidence? At The Waste Group, we supply a wide range of high-quality aggregates perfect for any driveway. Get in touch for a competitive quote and fast, reliable delivery across Dorset. Find out more at https://www.thewastegroup.co.uk.