How to Dispose of Soil in the UK The Complete Guide
How to Dispose of Soil in the UK The Complete Guide
First things first: before you even think about booking a skip or a grab lorry, you have a crucial question to answer. Is the soil you're digging up a clean, reusable resource, or is it a regulated waste that needs special handling?
Getting this wrong is the quickest way to run into unexpected costs and even fines from the Environment Agency. This single distinction between clean, inert soil and contaminated soil dictates everything that comes next – your legal duties, the final bill, and all your disposal options.
Is Your Soil a Resource or Regulated Waste?
The soil from your project isn't just "dirt"; under UK law, it's a material that has to be correctly classified. Think of it this way: clean soil can often be reused locally or sent to an inert landfill quite affordably. Contaminated soil, on the other hand, is legally classified as hazardous waste and demands specialised testing and disposal, which costs significantly more.
Answering this question starts with a bit of common-sense detective work on your site. No lab coat required for this initial check!
The Initial Site Assessment
Start by considering the history of the land. If you're digging up a garden in a new housing estate that's only ever grown vegetables, chances are the soil is clean, or "inert." Inert waste is the term for material that's chemically stable and doesn't decompose, making it simple to manage.
But if the site has a more colourful past, you need to be more cautious. Was it ever an industrial yard, a garage, or an old property where coal ash was dumped for years? These previous lives can leave a nasty legacy of pollutants like heavy metals, hydrocarbons, or even asbestos.
Next, use your senses. Does the soil have a strange, chemical smell? Can you see a rainbow-like sheen on any puddles, which could point to oil or fuel? Are there foreign objects mixed in, like bits of brick, plastic, or metal? These are all red flags suggesting the soil may not be clean.
To help you out, here's a quick checklist for that initial assessment.
Initial Soil Assessment Checklist
Use this checklist to quickly assess whether your soil is likely clean or requires further investigation.
| Assessment Factor | Indicator of Clean Inert Soil | Indicator of Potential Contamination |
|---|---|---|
| Site History | Greenfield site, residential garden, agricultural land with no known industrial use. | Former industrial site, garage, scrapyard, land near old railway lines, or unknown history. |
| Visual Check | Uniform colour and texture (e.g., brown, sandy, clay-like). No foreign objects. | Discoloured patches, fragments of building materials (asbestos, brick), plastic, metal, or waste. |
| Smell | Natural, earthy smell. | Chemical, petrol, solvent, or rotten egg smells. |
| Texture/Feel | Feels natural, not oily or greasy. | Oily or greasy texture, visible liquid contamination. |
This simple check gives you a solid starting point for figuring out what you're dealing with.
The concept of "Waste Duty of Care" places the legal responsibility squarely on you, the waste producer, to correctly classify your waste. Stating that you "didn't know" the soil was contaminated is not a valid defence if it is disposed of incorrectly.
When Contamination Is a Concern
If that initial check raises any doubts at all, you absolutely cannot assume the soil is clean. Trying to dispose of potentially contaminated soil as inert waste is illegal and harms the environment. When there's any risk, the only way forward is professional testing.
This is where a Waste Acceptance Criteria (WAC) test comes in. A WAC test involves sending a soil sample to a lab for a detailed chemical breakdown. The results will definitively tell you if the soil is:
- Inert: Clean and suitable for the most affordable inert landfills.
- Non-hazardous: Has low levels of contaminants but can still be accepted at many standard landfills.
- Hazardous: Contains contaminant levels that are above legal thresholds, meaning it must go to a specialist hazardous waste facility.
Yes, a WAC test is an extra upfront cost, but it provides the essential legal proof that disposal sites require to accept your waste. For contractors and developers, skipping this step on a commercial or high-risk site will get your load rejected, leading to massive project delays and logistical chaos.
For a homeowner digging up a small amount of soil from a typical garden, testing is rarely needed. But for anyone else, it's a non-negotiable part of a compliant and cost-effective project.
Getting rid of soil in the UK involves a bit more than just hiring a skip. You've got to get your head around the environmental laws, which are there to protect our countryside and make sure waste goes where it should. Get it wrong, and you could be looking at some hefty fines.
At the core of it all is your 'Waste Duty of Care'. This is a legal responsibility that lands squarely on your shoulders as the person creating the waste. From the moment that soil comes out of the ground to its final resting place, you're accountable for it.
And you can't just pass the buck. Even when you hand the soil over to a waste carrier, your responsibility doesn't end. You have to do your due diligence and make sure they're properly registered and that the soil is heading to a licensed facility.
The Waste Transfer Note: Your Legal Paper Trail
A critical piece of this puzzle is the Waste Transfer Note (WTN). This isn't just a simple receipt; it’s a legal document that proves you've done everything by the book. It creates a clear, unbroken chain of custody, tracking the soil from your site to its final destination.
Think of it like a passport for your soil. Every time the waste changes hands, a WTN needs to be filled out and signed by both sides. As the producer, you must hang onto your copy for at least two years. It’s your official proof that you acted responsibly.
A proper WTN has to include specific details to be legally sound. It needs a clear description of the waste (e.g., 'inert soil'), the quantity, and collection details. For a full rundown on what this involves, have a look at our detailed guide on what is a Waste Transfer Note.
Permits, Exemptions, and When They Matter
For most homeowners doing a bit of garden work, using a licensed waste carrier and getting a WTN is all you need to worry about. But when you get into larger construction projects or situations where you're moving soil to reuse it, things can get a bit more complex with permits and exemptions.
- Environmental Permit: This is needed for running a proper waste facility, including sites that treat or deposit soil permanently.
- Waste Exemption: This lets you carry out certain low-risk waste activities without a full-blown permit. A classic example is using clean, excavated soil for construction or landscaping on another site under what’s known as a U1 exemption.
It’s a common myth that if you're just moving soil around on your own property, the rules don't apply. But shifting large amounts, even within your own boundary lines, can be classed as a waste disposal activity that needs a green light from the Environment Agency.
Imagine a large housing developer digging out foundations. They might register for an exemption to use that clean soil to create landscape features elsewhere on the development. It saves on disposal costs and is great for sustainability, but it has to be done within the proper regulatory framework. Cutting corners here can be a very expensive mistake.
The sheer volume of soil being moved around the UK shows just why these rules are so crucial. According to government data from 2020, out of 191.2 million tonnes of total waste generated, construction and demolition waste accounted for a massive 59.4 million tonnes.
The good news? An impressive 92.6% of this was recovered, showing a huge industry shift towards recycling and reuse instead of just filling up holes in the ground. By following the right process, your project plays a part in these fantastic national recovery efforts and ensures your soil gets a second life wherever possible. You can read more UK statistics on waste on the official government website.
A Practical Process for Soil Disposal
Once you’ve got a handle on what kind of soil you're dealing with, it’s time to get into the nitty-gritty of actually getting it off your property. Following a clear, methodical process doesn't just keep you on the right side of UK regulations; it can genuinely save you a packet on your project costs. A bit of proper handling from the start saves a world of headaches later.
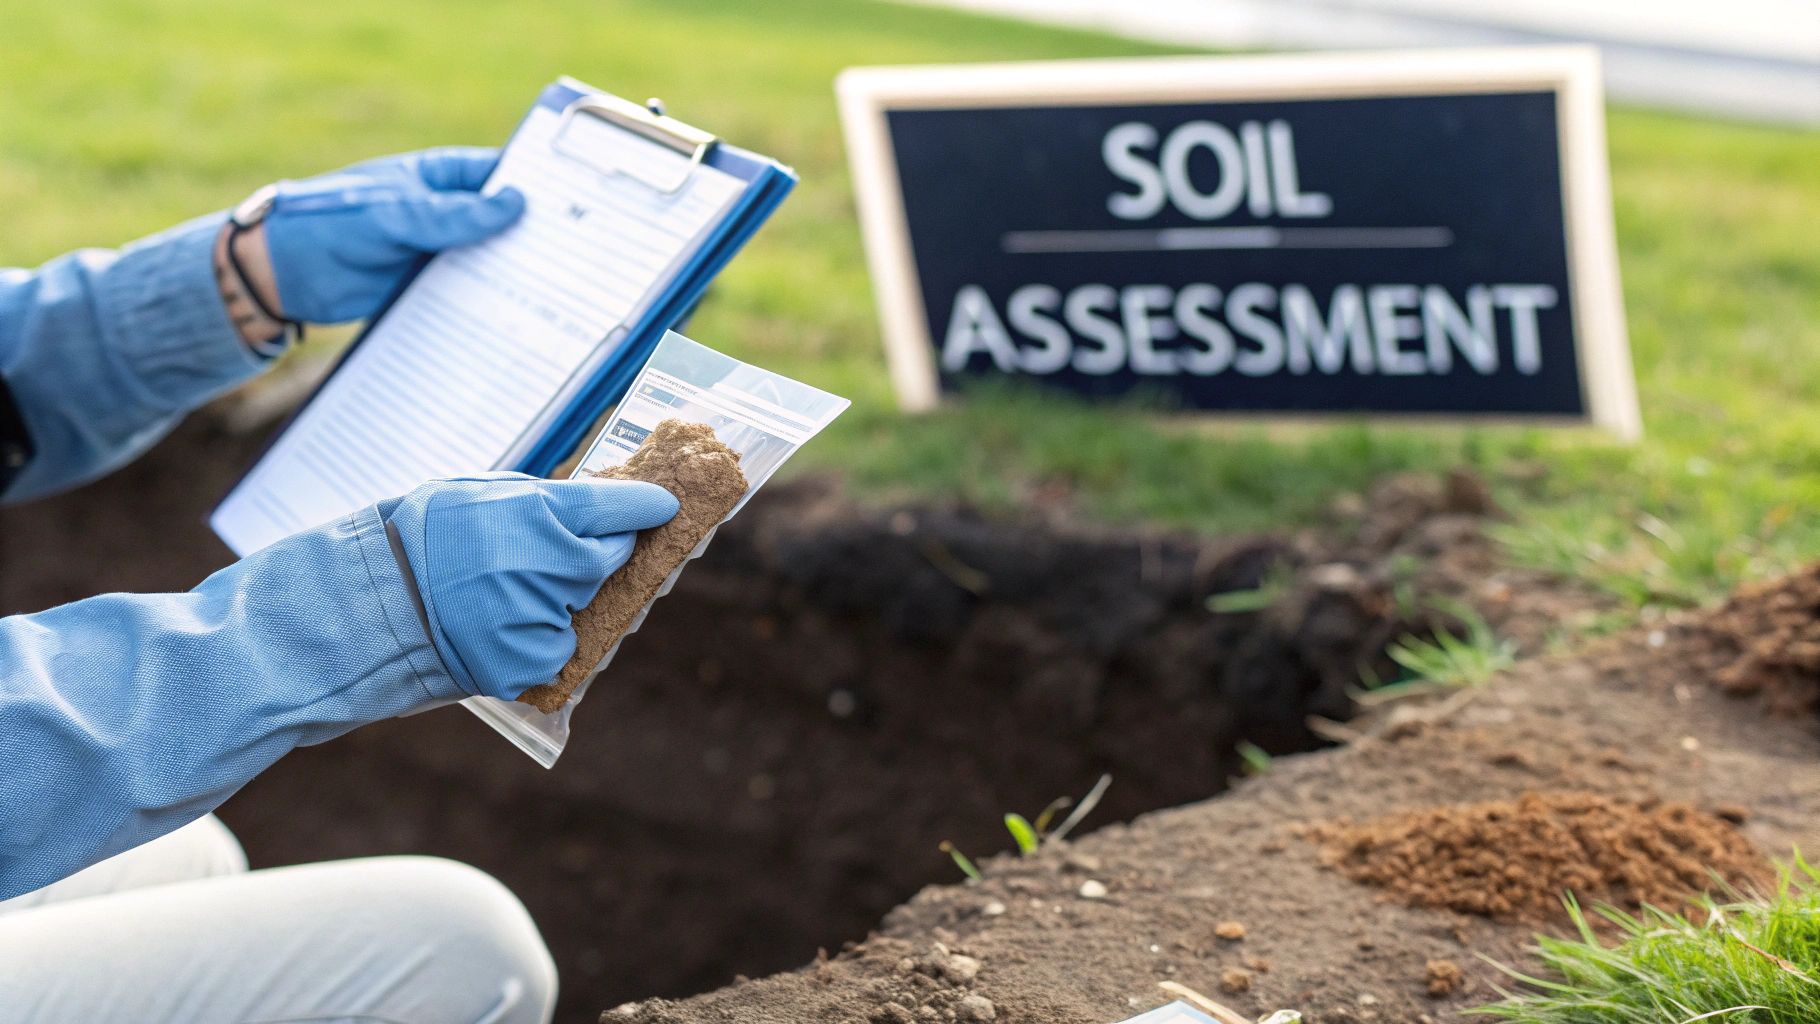
Everything starts with classification. This single step dictates everything that follows. If your initial look at the site raised a few red flags, or if you’re on a commercial job, a Waste Acceptance Criteria (WAC) test is your next port of call. Getting one is simple enough: a sampler pops over to your site, takes a few representative samples, and sends them off to a UKAS-accredited lab for analysis.
The results will class your soil as either inert, non-hazardous, or hazardous. This certificate is the key that unlocks all your disposal options. Without it, licensed facilities will simply turn your lorry away – unless it's obviously clean topsoil from a garden project.
Segregation and Storage On-Site
Whether you’re waiting on those lab results or you know for a fact you're dealing with clean, inert material, how you store the soil on-site is absolutely critical.
The golden rule is segregation. Never, ever mix your soil with other waste streams. Keep your excavated earth in a completely separate pile from things like timber offcuts, bits of plastic, or general rubbish.
Mixing waste is the quickest way to send your disposal bill through the roof. A lorry-load of clean, inert soil is relatively cheap to get rid of. But the second it gets contaminated with other stuff, the entire load is reclassified as expensive "mixed waste," and you'll be charged a much, much higher rate.
To keep things in order:
- Designate a specific spot for your soil stockpile, well away from other skips or piles of waste.
- Cover the pile with tarpaulins. This stops the rain from turning it into a sludgy mess and prevents contaminants from washing into it from elsewhere on the site.
- Mark out clear boundaries if you've got multiple waste types on the go. This stops machinery or even just foot traffic from accidentally mixing them.
This simple bit of discipline is fundamental. For instance, if you're planning a house extension, thinking ahead about where your excavated soil will go is a crucial part of managing the project properly.
Proper segregation isn't just best practice; it's a financial necessity. A single contaminated item can reclassify an entire 8-tonne lorry load of soil, potentially increasing the disposal cost by more than double.
Exploring Your Disposal Options
With your soil properly classified and stored, you can finally pick the right disposal route. The best option really depends on your soil type, how much you have, and where your site is.
For smaller domestic jobs with clean garden soil, hiring a skip might be the most straightforward solution. But when you’re dealing with larger volumes, it’s well worth exploring all the avenues. Understanding the differences is key to making a smart decision that balances cost, convenience, and compliance.
This flowchart maps out the key decision points you'll face.
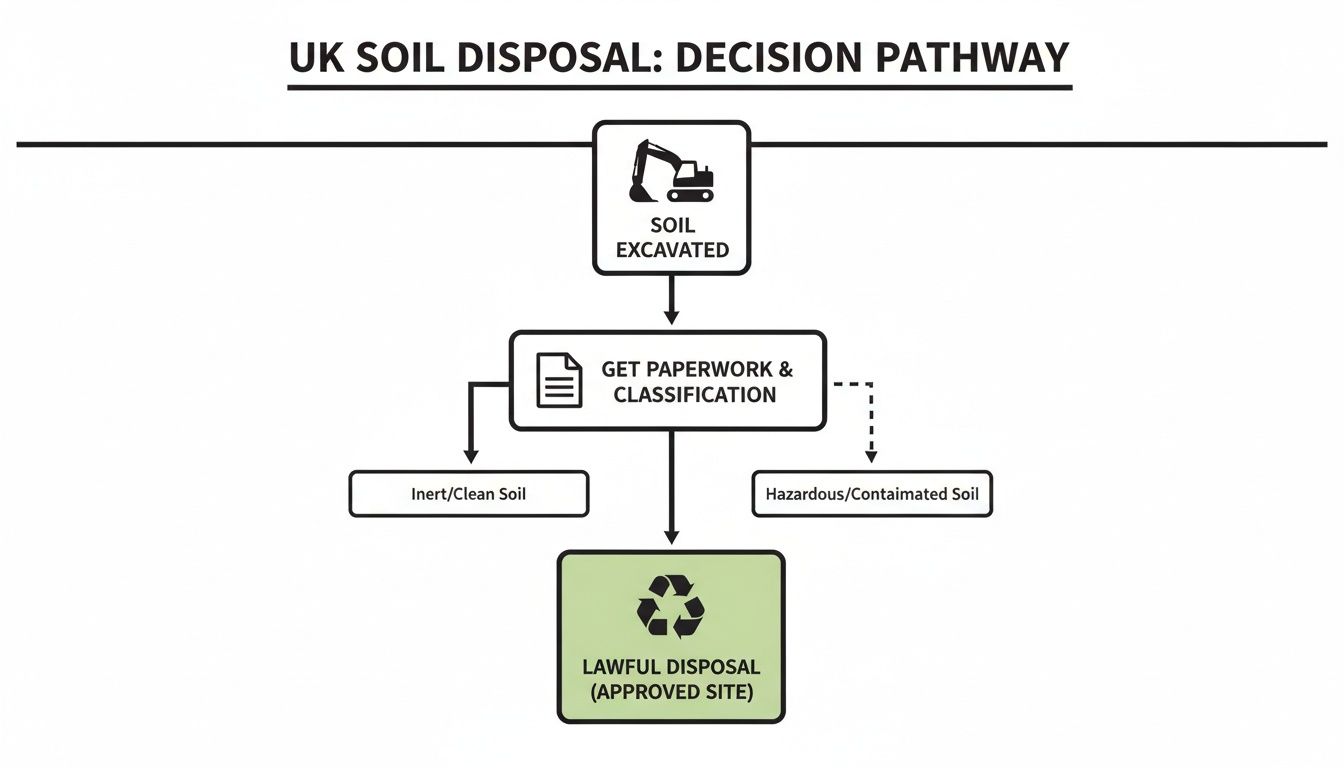
As you can see, proper classification and having the right paperwork are non-negotiable steps before you can legally and responsibly get rid of soil.
Licensed Landfills and Treatment Facilities
For most projects, excavated soil ends up at a licensed waste facility. Your WAC test results or soil classification will determine exactly where it can go.
- Inert Waste Landfills: These sites are specifically for clean, non-reactive waste like soil, rubble, brick, and concrete. The gate fees here are the lowest, making it the most budget-friendly option for inert waste.
- Non-Hazardous Landfills: If your soil has low levels of contamination, it’s headed for a standard non-hazardous landfill. These have more sophisticated environmental controls, and as you'd expect, higher gate fees.
- Soil Treatment Facilities: Think of these as "soil hospitals." These advanced centres can take contaminated soil and use various processes to remove the pollutants. The cleaned soil can often then be reused. While the upfront cost can be higher, it's by far the most sustainable route.
For bigger jobs, just the logistics of moving several tonnes of soil can be a headache. Many of our clients find that a grab lorry is a lot more efficient than ordering multiple skips. You can learn more about the benefits of using a grab lorry for waste removal in our helpful article. They can shift huge volumes in one go, especially if site access is decent.
Your waste management partner can guide you to the most suitable, fully licensed destination for your specific type of soil, ensuring you stay compliant every step of the way.
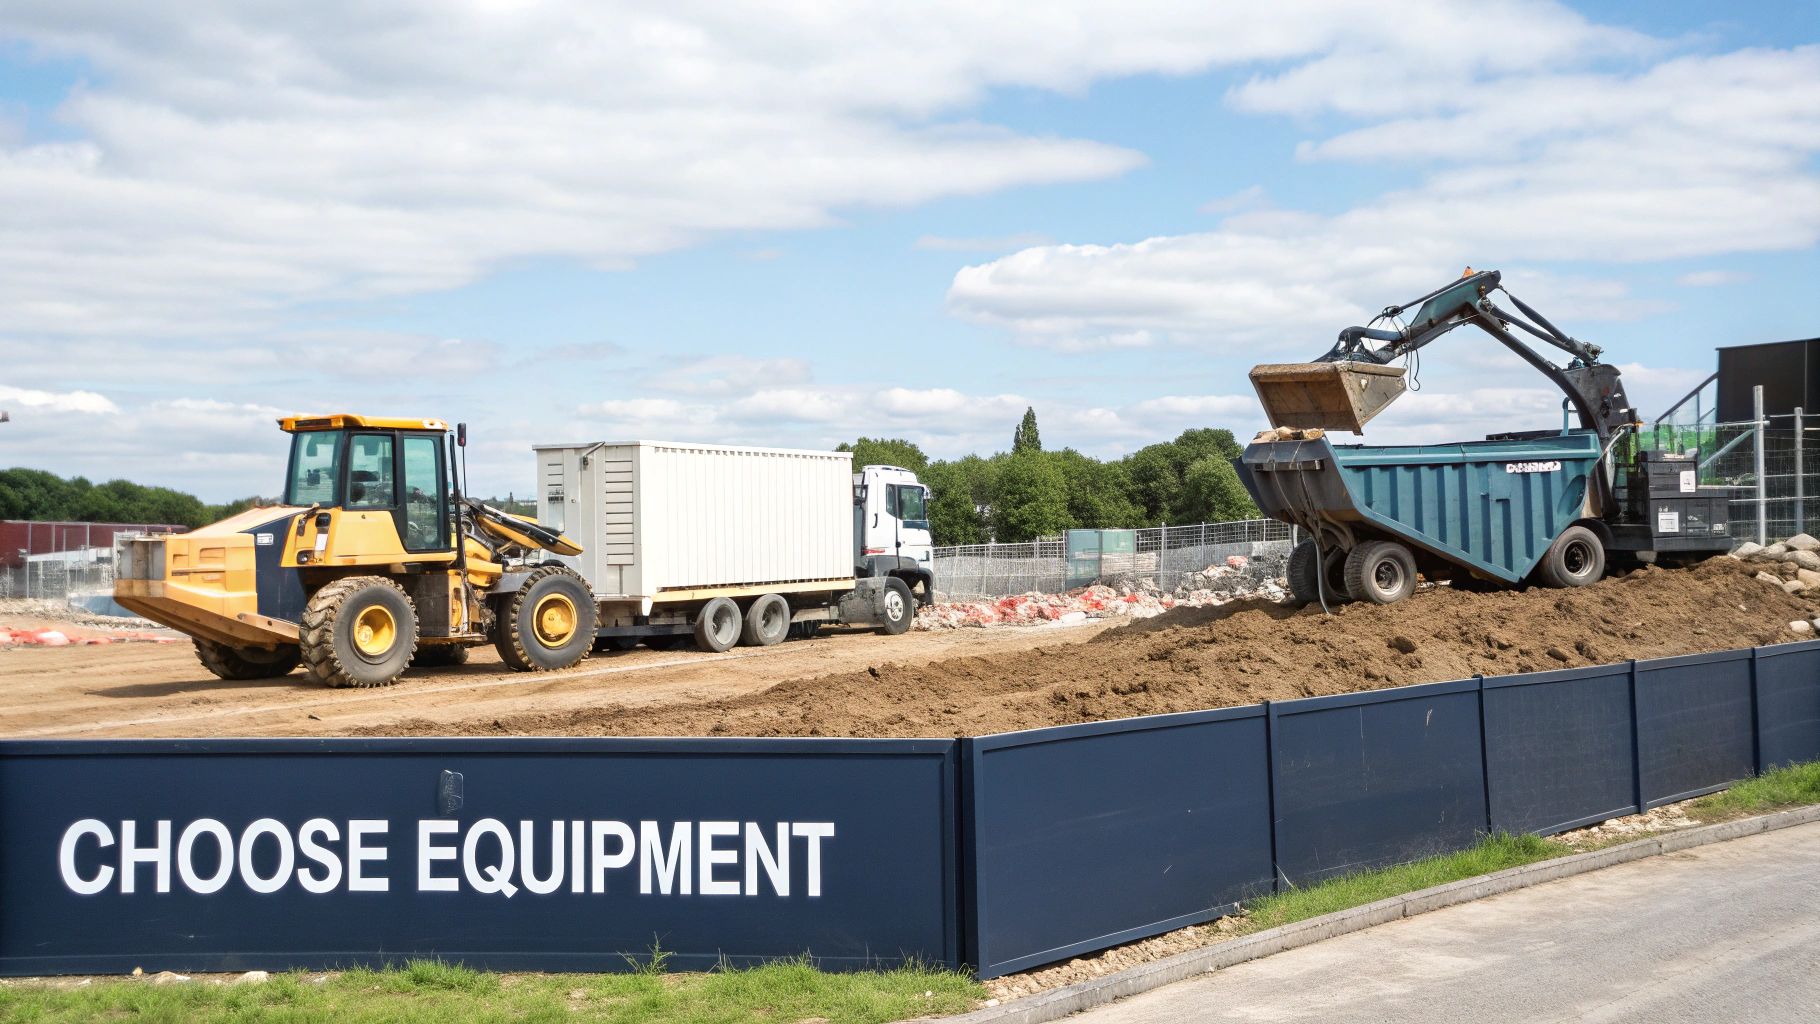
Choosing Your Soil Removal Equipment
Picking the right kit to get rid of your soil is one of the biggest calls you'll make, impacting both your budget and your project's timeline. It's not just about shifting dirt; it’s about doing it smartly and without wasting money. Whether you go for a skip, a grab lorry, or a massive Roll-on/Roll-off (RORO) container really boils down to the size of your job, the access you have, and how much elbow grease you're willing to put in.
Get it wrong, and it’ll hit you in the wallet. A skip that’s too small means you’re paying for a second one. Hiring a huge RORO for a simple garden tidy-up is just money down the drain. Let's dig into which option makes the most sense for your project.
Skips For Smaller Projects
For most jobs around the house, the humble skip is your best bet. If you’re giving the garden a makeover, digging out a pond, or laying a new patio, a 4-yard or 6-yard skip is usually the perfect size for the soil and rubble that comes out.
- Best for: Small-scale garden clearances, patio foundations, and minor landscaping jobs.
- Key Advantage: You can pop one on your driveway for a set period, letting you load it up as you go.
- Considerations: You’ll be doing the heavy lifting yourself with a spade and wheelbarrow. Remember, if it's going on a public road, you’ll need to sort out a permit with your local council first.
In short, skips are a straightforward, contained solution when you’ve got a manageable amount of soil to shift.
Grab Lorries For Speed and Convenience
When you're dealing with a bigger pile of soil or the access to your site is a bit tricky, a grab lorry is an absolute lifesaver. These trucks come with their own hydraulic arm and bucket, so they can literally reach over a fence or wall, grab the soil, and load it up without you having to lift a finger.
A grab lorry is perfect for spots where you just can't place a skip. As long as your soil pile is within reach of the crane (usually about 6-8 metres), it can be cleared away in no time. This can turn a full day of back-breaking labour into a quick, two-hour job.
A standard grab lorry can shift around 16 tonnes in a single trip – that’s the equivalent of two large skips. This makes it a seriously cost-effective and time-saving choice for medium-to-large home projects or small commercial jobs.
This kind of efficiency is more important than ever. While the UK has gotten much better at reducing landfill, soil and stones still make up a big chunk of what gets buried. Back in 2020, England generated 162.8 million tonnes of waste. And while the recovery rate for construction materials hit an impressive 94.3% in 2022, proper soil handling is key. Using the right equipment helps firms like ours in Dorset ensure everything is disposed of by the book, avoiding fines and doing our bit for the environment. You can dig into the numbers by reading these UK statistics on waste management.
RORO Containers For Major Excavations
When you step up to large-scale construction sites, demolitions, or major commercial landscaping, nothing but a Roll-on/Roll-off (RORO) container will do the job. These are the giants of the waste world, holding anywhere from 20 to 40 cubic yards of material.
If you need to dispose of soil in massive quantities, a RORO is the only practical way to go. It cuts down on vehicle movements and gives you the best value per tonne for huge volumes. The catch? They need a serious amount of space for delivery and placement, which rules them out for most residential settings. They are the true workhorses of the commercial construction industry, built for maximum capacity on the biggest projects.
Comparing Soil Disposal Equipment
Not sure which vehicle is right for your job? This quick-glance table breaks down the pros and cons of each to help you decide.
| Equipment Type | Best For | Key Advantages | Things to Consider |
|---|---|---|---|
| Skip | Small domestic projects (garden makeovers, patio foundations) | Can be kept on-site for flexible loading; various sizes available. | Requires manual loading; a council permit is needed for on-road placement. |
| Grab Lorry | Medium-to-large projects with tricky access | No manual loading needed; can remove large volumes quickly (approx. 16 tonnes). | Soil must be piled within the crane's reach (6-8 metres). |
| RORO Container | Major commercial construction, demolition, and excavation projects | Maximum capacity (20-40 cubic yards); most cost-effective for huge volumes. | Requires significant space for delivery and placement; not for home use. |
Ultimately, matching the equipment to the scale of your project saves you time, money, and a lot of hassle.
Sustainable Alternatives to Landfill

While licensed landfills are a perfectly compliant way to handle waste soil, they should always be the last resort, not your go-to option. Thinking beyond the skip can seriously reduce your project's environmental footprint and, quite often, its costs. The modern, responsible approach is to see that pile of excavated earth not as waste, but as a resource waiting for a new home.
This shift in mindset is a big part of the UK's wider success in waste management. In fact, UK waste stats show just how crucial this is. The recovery rate for non-hazardous construction and demolition materials, including soil, hit an incredible 92.6% back in 2020. This isn't by accident; it's driven by policies designed to keep materials out of landfill.
Here at The Waste Group, our services in Dorset are all about feeding into this circular system. Whether it's a 4-yard skip for a garden makeover or a 40-yard RORO for a major contractor job in Bournemouth, we're geared up for sustainable disposal. When you work with us, you're doing your bit to help hit those national targets. You can discover more insights about UK waste data on GOV.UK.
Reusing Clean Soil On-Site and Locally
Often, the greenest and cheapest option is the simplest one: reuse the soil yourself. If you've dug up clean, inert soil, there are countless ways to put it right back to work.
- Landscaping and Garden Projects: Use it to build raised beds, level out your garden, or create features like banks and mounds.
- Backfilling and Levelling: It’s ideal for filling trenches after laying new pipes or for evening out bumpy ground on your property.
- Engineered Subsoil: On bigger construction sites, clean soil can be used as engineered fill to raise ground levels, saving a small fortune on buying in new aggregate.
If you have more than you can handle, think local. Community gardens, allotments, or even your neighbours might be crying out for good-quality topsoil. A quick post on a local Facebook group or community forum can often connect you with someone who needs exactly what you're trying to get rid of.
Soil Treatment and Remediation Centres
But what about soil that isn't clean? Even if it's contaminated, that doesn't mean it's automatically destined for a hazardous waste landfill. This is where specialised soil treatment centres come in.
Think of these places as recycling plants for earth. They take soil with low or moderate contamination levels and use various clever processes to clean it up. Once treated, the soil is thoroughly tested to make sure it meets strict standards, and then it's ready to be used again as a safe, quality aggregate or topsoil.
This process, known as remediation, is a cornerstone of the circular economy. It turns a potential liability—something that would otherwise take up precious landfill space—into a certified, reusable product. It’s closing the waste loop, one lorryload at a time.
This is especially important for bringing old industrial sites, or brownfield land, back into use. It allows developers to turn contaminated ground into a valuable asset for new construction. You can see how other reclaimed materials get a new lease of life by reading our article on the recycling of aggregates.
The Value of Composting
For smaller amounts of topsoil, especially the stuff that's rich in organic matter, composting is another brilliant, eco-friendly solution.
Mixing it into a compost pile with your grass clippings and kitchen scraps creates a fantastic, nutrient-rich material that will do wonders for your garden's fertility. It’s a completely natural process that improves your own soil while cutting out transport and disposal costs entirely. To get started, check out this brilliant guide on how to start composting.
Common Questions About Soil Disposal
Even with the best-laid plans, the rules around soil disposal can throw up a few tricky questions. Getting clear, straightforward answers is the key to managing your project without a hitch and avoiding the common mistakes that lead to surprise costs or delays.
Let's dig into some of the most frequent queries we get from homeowners and trade customers alike. Getting these details right not only keeps you compliant but also makes sure you’re getting the best value for your money.
Can I Mix Soil in a General Waste Skip?
In a word: no. This is one of the most important rules to get right. Soil absolutely must be kept separate from general waste like wood, plastic, or any old household rubbish.
Under UK regulations, soil is classed as inert waste. This just means it's chemically stable and won't decompose. General waste is a completely different beast, requiring a far more complex—and expensive—disposal process.
When you mix them, you contaminate the entire load. A skip full of clean soil can be processed cheaply at a licensed facility. But the moment you add other materials, the whole lot has to be treated as pricey "mixed general waste," and you'll be hit with the much higher disposal rate.
Be upfront with your waste provider about exactly what you're getting rid of. Ordering a dedicated "inert waste" or "soil and hardcore" skip is always the smartest, most cost-effective way to handle your excavated materials.
How Do I Know if My Soil Is Contaminated?
For most small domestic jobs, like digging out a new flower bed or a patio base in a long-established garden, the soil is almost certainly clean. But it never hurts to do a little detective work before you start shifting it.
First, have a think about the land's history. Has it always been a garden, or could it have been the site of an old garage, a workshop, or even an industrial building? Past uses can leave behind all sorts of nasty stuff.
Next, just use your senses for a quick check:
- Look: Do you see any strange colours or an oily sheen on puddles? Are there bits of stuff that clearly aren't soil, like fragments of asbestos sheeting, chunks of metal, or old clinker from a fire?
- Smell: Does the soil have a chemical, petrol-like, or otherwise unnatural smell instead of that normal earthy aroma?
If any of these red flags pop up, or if you're working on a commercial or previously developed site, you can't just cross your fingers and hope for the best. In these situations, getting a Waste Acceptance Criteria (WAC) test is the only way to be sure. This lab analysis gives you a definitive breakdown of what's in your soil, and disposal facilities will often require it by law before they'll even let you through the gates.
What Is a Waste Transfer Note and Why Do I Need One?
Think of a Waste Transfer Note (WTN) as the passport for your waste. It's a legally required document that creates a paper trail, proving you've done your bit to dispose of your soil responsibly from the moment it leaves your property. This is a core part of your 'Duty of Care'.
It’s essentially a formal handover record. The WTN has to include specific details:
- A clear description of the waste (e.g., 'Inert soil and stone')
- The amount of waste being moved
- Your details as the person producing the waste
- The details of the licensed waste carrier collecting it
Both you and the driver must sign the WTN, and you are legally required to keep your copy for at least two years. This little piece of paper is your proof that you handed your waste over to an authorised company for proper, lawful disposal.
Is It Cheaper to Dispose of Soil Separately?
Yes, absolutely. Keeping your soil separate from other types of waste is one of the biggest money-saving tricks in the book. Clean, inert materials like soil, bricks, and concrete are far, far cheaper to get rid of than mixed general waste.
The reason is simple. Inert waste landfills have much lower gate fees because the material is stable and doesn't pose an environmental risk. It doesn’t produce the harmful liquids (leachate) or gases that rotting general waste does.
By separating your soil on-site, you get to access these much lower disposal rates. If you chuck everything into one skip, you get charged at the rate of the most expensive item in there. A bit of organisation at the start of a job can lead to some serious savings on the final invoice.
Getting your soil disposal right doesn't have to be a headache. For straightforward advice and reliable skip or grab hire in Dorset, The Waste Group is here to help. Explore our services and get a quote today.