Removal of asbestos ceiling: A Homeowner’s Practical Guide

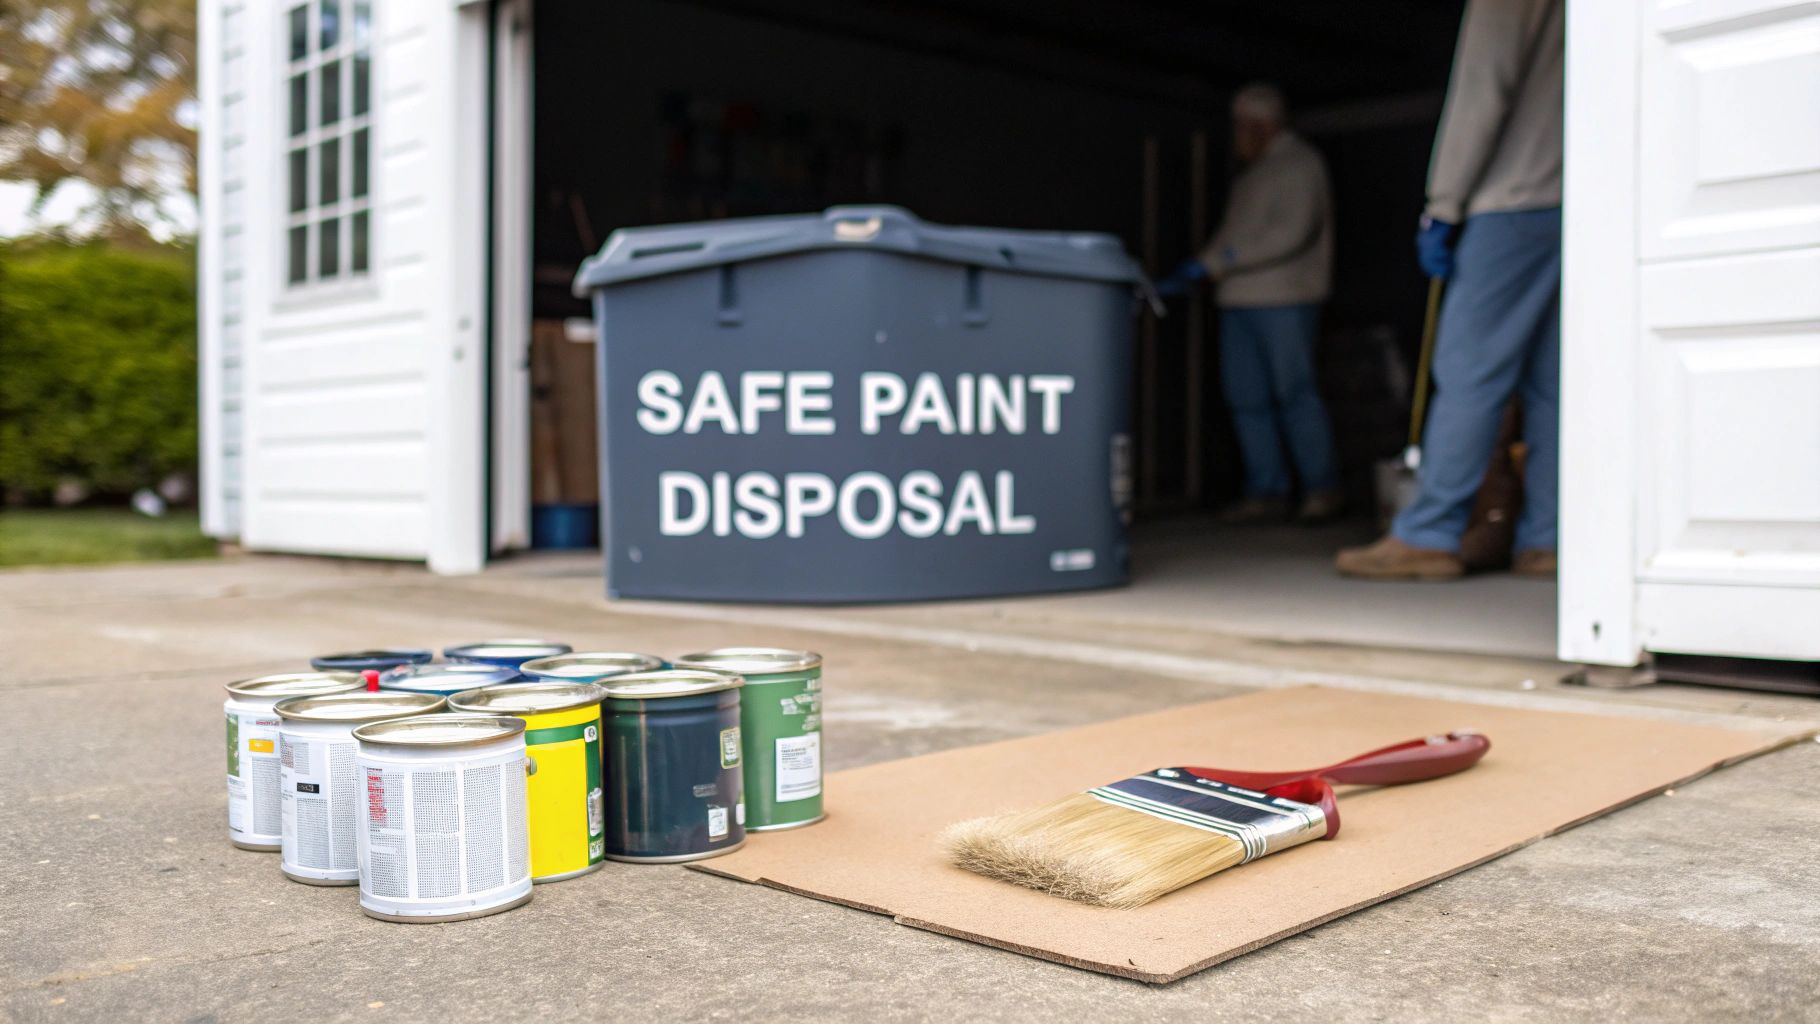
Need Asbestos Disposal in Dorset?
The Waste Group are licensed asbestos disposal specialists serving across Dorset
Call us: 0800 652 0160
Fast, safe and fully licensed asbestos collection and disposal
Removal of asbestos ceiling: A Homeowner’s Practical Guide
The job of removing an asbestos ceiling is one for licensed professionals, period. It’s just not worth the serious health risks involved. If your home was built any time before 2000, there's a real chance that materials like textured coatings (think Artex) or ceiling tiles contain asbestos. Disturbing them without the right safety controls can release a cloud of dangerous fibres into the air you breathe.
The Hidden Hazard in Your Ceiling
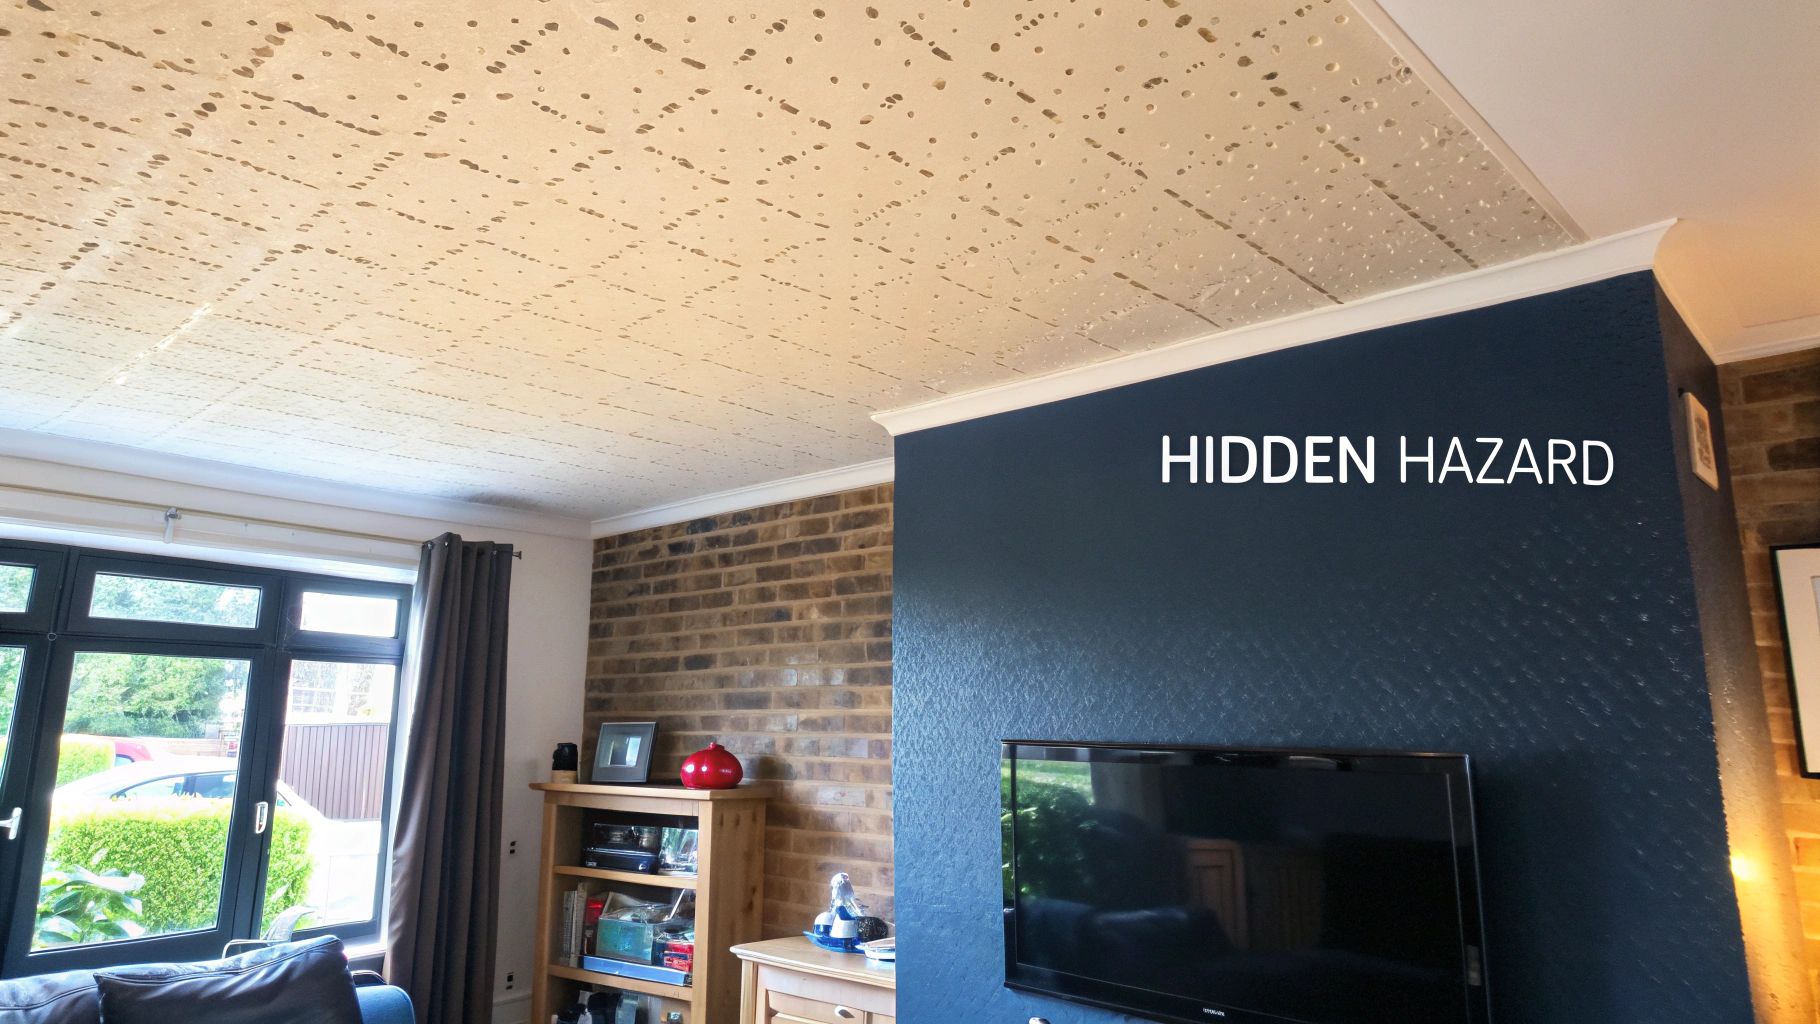
Realising your ceiling might contain asbestos can be a genuinely unsettling moment. It’s strange to think that this naturally occurring mineral was once praised for its incredible fire-resistant and insulating properties, making it a star ingredient in countless building products across the UK. Of course, now we know the devastating health consequences that come with it.
The best way to think about asbestos-containing materials (ACMs) in your ceiling is like a sleeping bear. If you leave it completely alone and it's in good nick, it poses very little threat. But the second you start drilling, sanding, or pulling down that ceiling for a renovation, you've just poked the bear. This disturbance unleashes microscopic, needle-like fibres into the air – fibres that, if inhaled, can lead to serious and fatal lung diseases many years down the line.
Why Was Asbestos Used in Ceilings?
Before the ban came into force, asbestos was the go-to additive for making building materials stronger and more fireproof. It was incredibly versatile, which means it can be found in all sorts of places, often hiding in plain sight.
To help you spot potential trouble spots, here’s a quick rundown of the most common asbestos-containing materials found in UK ceilings.
Common Asbestos-Containing Ceiling Materials in UK Homes
| Material Type | Common Appearance | Typical UK Installation Period | Risk When Disturbed |
|---|---|---|---|
| Textured Coatings (e.g., Artex) | Stippled, swirled, or patterned finishes. Usually painted over. | 1960s – late 1990s | High. Sanding or scraping releases fibres directly into the air. |
| Asbestos Insulating Board (AIB) | Off-white or grey panels, often looks like thick cardboard. | 1950s – early 1980s | Very High. AIB is friable and easily crumbles, releasing large quantities of fibres. |
| Asbestos Cement Sheets | Hard, grey, brittle sheets. Often used in garages and outbuildings. | 1930s – 1980s | Medium. Fibres are locked in cement but released if drilled, cut, or broken. |
| Asbestos Ceiling Tiles | Square or rectangular tiles, often with a slightly fibrous or textured look. | 1950s – 1980s | Medium to High. Risk increases if tiles are broken, crumbled, or removed carelessly. |
These materials are everywhere, meaning the legacy of asbestos is something many of us still have to deal with, especially when renovating older properties. Just imagine starting a project on your Dorset home, only to uncover crumbling asbestos. It’s a hidden killer still present in over 1.5 million buildings in the UK, including a shocking 75% of schools.
This is exactly why safe, professional removal is the only option. Even though the UK banned all types of asbestos in 1999, the law didn't require its removal from existing buildings. This left a dangerous inheritance for today's homeowners. You can read more about the impact of asbestos in the UK and its statistics to get the full picture.
Understanding this history is the first step toward managing the risk. It’s not about panicking; it's about being smart and informed. A measured, professional approach is the only way to ensure the safety of your home and family. The key is to replace that fear with knowledge.
How to Identify Asbestos in Your Ceiling
Spotting potential asbestos in your ceiling is a bit like playing detective, but it comes with a critical rule: you can gather clues, but you absolutely cannot make the final call yourself. A visual check is only ever a starting point, because asbestos fibres are microscopic and were mixed into materials in a way that makes them completely invisible.
That said, there are some tell-tale signs that should definitely make you pause and investigate further. The age of your house is the single biggest clue. If it was built or had major work done before the year 2000, the chance of finding asbestos-containing materials (ACMs) is much, much higher.
Common Visual Clues
Your first step is to simply look at the material itself. Certain textures and products were notorious for containing asbestos. Keep an eye out for these usual suspects:
- Textured Coatings: This is the most famous one, often known by the brand name Artex. If you have ceilings with swirled, stippled, or 'popcorn' patterns that were put up before the mid-1980s, they're prime suspects. While Artex made after this time was asbestos-free, older applications almost certainly contain it.
- Asbestos Insulating Board (AIB): This stuff can look just like ordinary plasterboard or ceiling panels but is far more dangerous. It was a popular choice for its fireproofing qualities, often used in places like airing cupboards, around boilers, or as ceiling tiles in garages and older office buildings. AIB is a real concern because it's highly 'friable', which means it can release fibres with very little disturbance.
- Ceiling Tiles: Those classic suspended or tiled ceilings, especially in buildings from the 1950s through to the 1980s, frequently contained asbestos for fire resistance and insulation. They often look like compressed fibreboard, sometimes with a slight pattern.
But even with these pointers, a visual check is fundamentally unreliable. Many modern, safe materials look identical to their hazardous old counterparts, and years of paint can easily hide the original texture.
The single most important thing to remember is this: you can never be 100% certain a material contains asbestos just by looking at it. The only way to know for sure is through professional sampling and lab analysis.
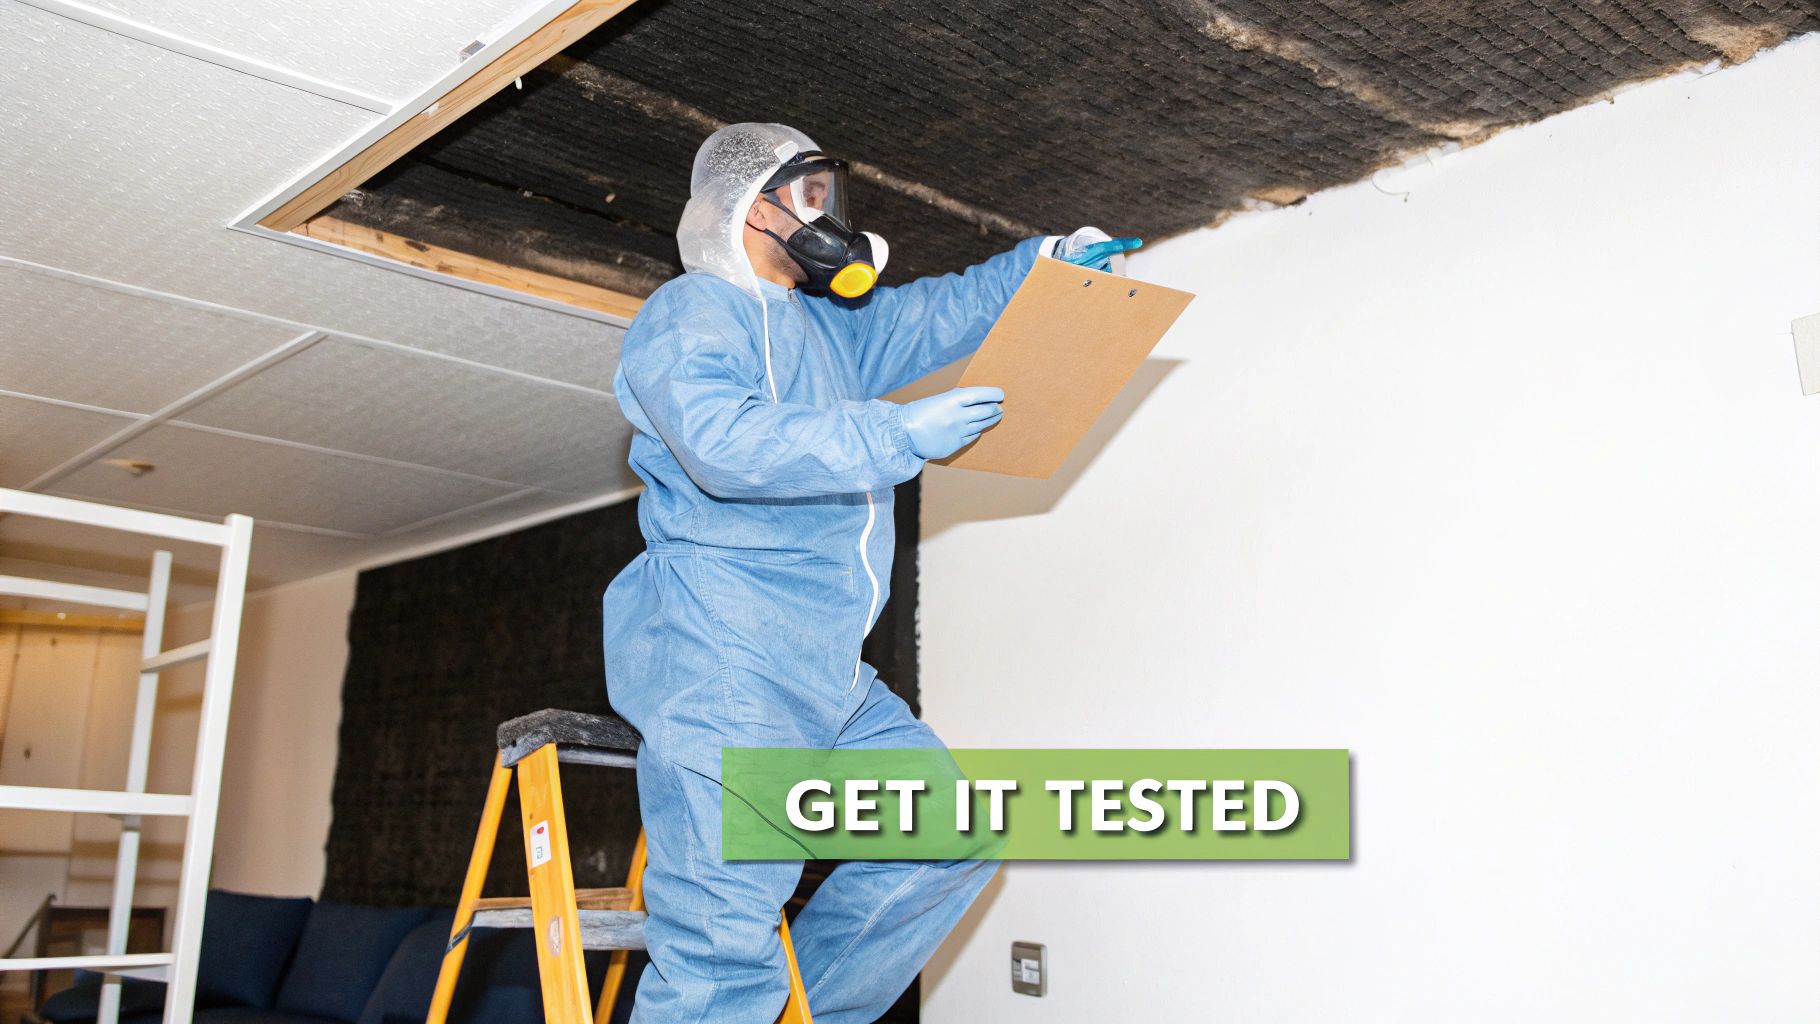
The Only Way To Be Sure: Professional Testing
Trying to take a sample yourself is incredibly dangerous. Breaking or scraping a piece of the material can release a concentrated puff of harmful fibres, contaminating your home and putting your health at risk. This is a job strictly for the professionals.
Here’s what the correct, safe process looks like:
- Hire a Surveyor: The first step is to contact a UKAS-accredited asbestos surveyor. This accreditation is your guarantee that they operate to the highest safety and quality standards recognised in the UK.
- Safe Sampling: The surveyor will arrive and carefully take a small, controlled sample of the ceiling material. They use specific methods, like wetting the area and using full protective gear, to make sure no fibres are released during the process.
- Laboratory Analysis: The sample is then securely sealed and sent to a UKAS-accredited laboratory. Here, technicians use powerful microscopes to definitively identify if asbestos is present, what type it is, and how much of it there is.
Once the results are in, you'll get a formal report confirming whether or not asbestos is in your ceiling. This document is crucial for planning any future work, whether that’s arranging for safe removal or deciding how to manage it in place. You can learn more by reading our detailed guide on identifying asbestos in your home.
Understanding UK Asbestos Regulations and Health Risks
The strict rules around asbestos aren't just bureaucratic red tape; they're a direct response to a very real, invisible danger. The problem starts when asbestos materials, like an old textured ceiling, get disturbed. When that happens, they release microscopic, needle-like fibres into the air. You can't see them, smell them, or taste them.
Once you breathe them in, these tiny fibres travel deep into your lungs and lodge themselves there permanently, a bit like splinters of glass. Your body can't break them down, which over many years leads to constant inflammation, scarring, and eventually, severe cell damage. This is what causes the devastating, and often fatal, diseases linked to asbestos.
The Human Cost of Asbestos Exposure
The awful thing about asbestos is that its effects aren't immediate. The damage builds silently, often taking decades to show up, but when it does, the consequences are incredibly serious.
- Mesothelioma: This is an aggressive and incurable cancer that grows in the lining of the lungs, heart, or abdomen. Asbestos exposure is the only known cause of it.
- Asbestos-Related Lung Cancer: It looks just like lung cancer caused by smoking, but it's triggered directly by the irritation from asbestos fibres lodged in the lung tissue.
- Asbestosis: A chronic, non-cancerous lung disease where scarring progressively builds up in the lungs. It causes severe shortness of breath and seriously impacts your ability to breathe.
The statistics really bring home the scale of this issue. In the UK, over 5,000 people die from asbestos-related diseases every single year. That makes it the biggest single cause of work-related deaths in the country, killing more people than falls from height and road accidents combined. This heartbreaking number is the legacy of past exposure to materials just like the ones used in ceilings during the post-war building boom. You can read more about the data behind asbestos's lingering legacy and its impact.
Navigating the Control of Asbestos Regulations 2012
To get a grip on this public health crisis, the UK government introduced the Control of Asbestos Regulations 2012. For any homeowner, this is the official rulebook for dealing with asbestos safely and legally. It might look complicated, but its main goal is straightforward: to stop those dangerous fibres from getting into the air in the first place.
The regulations set out a clear system based on risk, detailing what kind of work can be done and, crucially, who is allowed to do it. Ignoring these rules isn't just dangerous—it can land you with hefty fines and legal trouble. For a more detailed look, you can learn more about the specific regulations and compliance in asbestos removal.
At its heart, the law treats asbestos removal not as a simple DIY task, but as a hazardous material operation. It acknowledges that once fibres are airborne, they are uncontrollable and pose a risk to everyone in the vicinity.
For homeowners, the most important thing to understand is the difference between work that demands a licensed professional and work that doesn't.
Licensed vs Non-Licensed Asbestos Work
The law splits asbestos jobs into categories based on how likely they are to release fibres. This is what determines who can legally touch the material.
| Type of Work | Description & Risk Level | Who Can Do It? | Ceiling Material Example |
|---|---|---|---|
| Licensed Work | High-Risk. Involves materials that are friable (easily crumbled) and likely to release large quantities of fibres when disturbed. | Only a contractor holding a license from the Health and Safety Executive (HSE). | Removal of Asbestos Insulating Board (AIB) ceiling panels. |
| Non-Licensed Work | Lower-Risk. Involves materials where fibres are more tightly bound, such as asbestos cement. The risk of fibre release is lower but still present. | A competent, trained contractor (non-licensed). Not recommended for DIY. | Removing a single, intact asbestos cement sheet from an outbuilding roof. |
Here's the key takeaway: any work on textured coatings like Artex or on Asbestos Insulating Board (AIB)—the most common types found in ceilings—is almost always classified as licensed work. That means trying to remove an asbestos ceiling yourself is not only incredibly dangerous for your family's health, but it's also against the law. Sticking to the regulations is the only way to be sure the hazard is dealt with properly and everyone is kept safe.
The Professional Asbestos Removal Process Explained
When it comes to getting rid of an asbestos ceiling, the whole operation is less of a standard renovation job and more like a carefully controlled scientific procedure. It’s a multi-stage process where every single step is designed to stop dangerous fibres from escaping into your home. This meticulous approach is a world away from the chaos of a DIY attempt, which really hammers home why professional handling is the only safe and legal option.
A licensed asbestos removal project never starts with a hammer and crowbar. The first, non-negotiable step is a thorough risk assessment and the creation of a detailed plan of work. This document maps out the entire project from start to finish. It identifies the specific type of asbestos, the condition of the ceiling, and the precise methods that will be used for a safe removal. Think of it as the blueprint for a hazard-free outcome.
This flowchart shows the fundamental risks associated with asbestos, from the moment of exposure to the health and regulatory consequences.
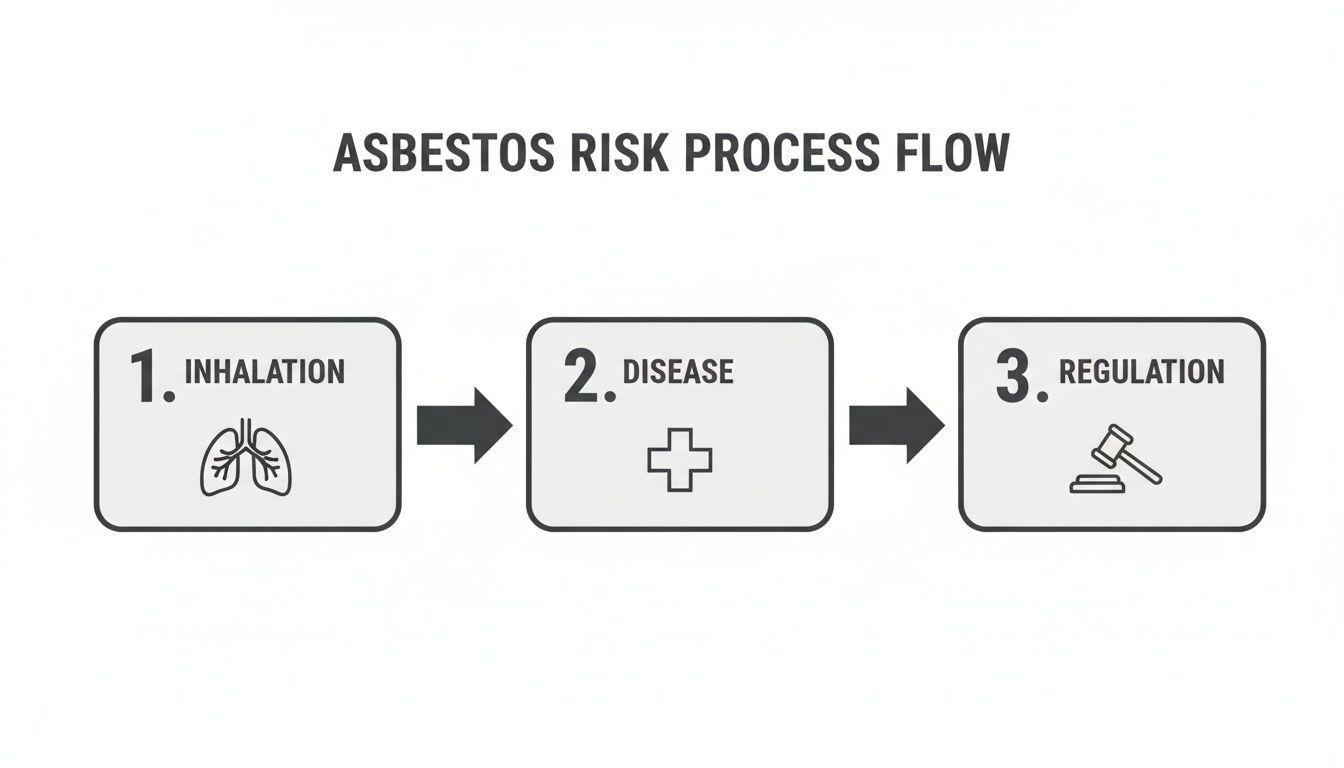
It’s a clear illustration: the danger begins with inhalation, progresses to serious disease, and is only managed through a strict legal framework.
Creating a Sealed and Safe Work Zone
Before a single tool touches the ceiling, the entire work area has to be completely isolated from the rest of the property. This is done by building a sealed enclosure, usually with heavy-duty polythene sheeting on the walls and floors. Every doorway, window, and even ventilation grille is sealed tight to create an airtight bubble around the hazardous material.
But this isn't just about taping up some plastic sheets. The professionals create what’s known as a negative pressure unit (NPU) inside this enclosure. Imagine it as a powerful, highly specialised vacuum cleaner. It constantly pulls air from the enclosure through a high-efficiency particulate air (HEPA) filter, trapping any microscopic asbestos fibres. This clever setup ensures that even if fibres do become airborne inside the sealed area, they simply cannot escape into your home.
A professional setup is a closed-loop system. The negative pressure enclosure ensures that air only flows into the work area, never out, effectively containing the hazard at its source. A DIY job, in contrast, turns the entire house into a contamination zone.
The Removal Method: Dust Suppression is Key
With the enclosure secure, the physical removal can begin. The single most important technique here is wetting. Professionals use a method called controlled wetting, applying a fine mist of water mixed with a special surfactant to the asbestos ceiling material. This dampens everything down, weighing down the fibres and dramatically cutting the amount of dust that gets kicked up when it's disturbed.
They then use specialised hand tools—never power tools—to gently scrape or prise the material away. This careful, methodical work is a completely different world from the aggressive demolition a DIY renovator might be tempted by, which would send clouds of dry, deadly fibres billowing through the air.
- Professional Approach: Controlled wetting, manual tools, slow and deliberate removal.
- DIY Risk: Dry scraping or breaking, use of power tools, creating a massive fibre release.
Decontamination and Safe Waste Handling
Once all the asbestos material is down, the job is far from over. The team has to go through a strict decontamination process. First, they use a special HEPA-filtered vacuum to clean every single surface inside the enclosure. After that, all surfaces are wet-wiped to capture any stubborn residue.
The asbestos waste itself is handled with extreme care. It’s immediately placed into thick, red asbestos waste bags, which are clearly labelled with legal warnings. This bag is then placed inside a second, clear asbestos waste bag—a process known as double-bagging. This creates a secure, sealed package ready for transport.
Finally, the sealed bags are taken out of the enclosure through a designated "bag lock" and stored in a locked skip or van. This waste can only be transported by a carrier with an upper-tier waste carrier license to a specially licensed hazardous waste disposal site. Once it’s disposed of, a waste consignment note is issued. This is your legal proof that the asbestos from your ceiling has been handled and disposed of in full compliance with UK law.
How to Budget for Asbestos Ceiling Removal
Figuring out the potential cost is often one of the biggest hurdles when you're faced with removing an asbestos ceiling. The price isn't a simple, one-size-fits-all figure; it's a calculation based on several key factors unique to your property. Getting a handle on these will help you set a realistic budget and properly weigh up the quotes you receive.
Think of it like booking a removal service for old furniture—the price changes depending on how much you have, what type of furniture it is, and how tricky it is to get out of the house. Asbestos removal works on a similar principle, but with safety and legal compliance as the main cost drivers.
Key Factors That Influence the Cost
Several things will directly impact the quotes you get from licensed contractors. Understanding them will help you see why one quote might be quite different from another.
- Type of Asbestos Material: This is the big one. Removing a textured coating like Artex is usually less expensive than taking out Asbestos Insulating Board (AIB). That's because AIB is more friable (crumbly), meaning it demands much stricter and more time-consuming safety measures to stop fibres from getting into the air.
- Size of the Area: The cost is almost always worked out per square metre. It stands to reason that clearing a small bathroom ceiling will be far cheaper than dealing with the ceilings across an entire floor of a house.
- Accessibility: A straightforward, ground-floor room with a standard-height ceiling is the easiest and quickest scenario. A job involving very high ceilings, awkward-to-reach spaces, or cluttered rooms will take more time for setup and labour, pushing the cost up.
It is crucial to remember that the cheapest quote is rarely the best. A suspiciously low price could mean corners are being cut on essential safety steps like air monitoring or correct disposal. This not only puts your family's health at risk but could also leave you legally exposed.
What Should a Comprehensive Quote Include?
A professional and transparent quote for asbestos ceiling removal should be fully itemised, leaving no room for nasty surprises later on. When you're trying to estimate the expense, it can be helpful to look at general insights into understanding remodel costs and budgeting tools to get a broader perspective on how these projects are budgeted.
At a minimum, your quote should clearly break down the following services:
- Initial Survey and Sampling: If you haven't had one done already, this is the step that confirms the presence and type of asbestos.
- Setup of Sealed Enclosure: This covers the cost of all the materials and labour needed to create the sealed-off, negative pressure containment zone.
- Labour for Removal: This is the core cost for the licensed team to safely remove the asbestos-containing materials from your ceiling.
- Air Monitoring: An independent specialist should conduct air testing during and after the removal to give you the all-clear that the area is safe to re-enter.
- Waste Disposal Costs: This includes the specialised, double-bagged waste sacks and the licensed transport required to take the waste to a registered hazardous waste facility.
- Certification: The final cost should always include providing you with a waste consignment note. This document is your legal proof that the asbestos was handled and disposed of correctly.
A quote that clearly lists these elements is a great sign. It shows the contractor is serious about following the strict regulations laid out by the Health and Safety Executive (HSE) and isn't trying to hide any costs.
Choosing the Right Asbestos Removal Contractor

Picking the right professional to remove an asbestos ceiling is hands down the most critical decision you'll make in this entire process. This isn't like hiring a painter or a plumber. You are literally entrusting the health and safety of your family to this person.
A competent, compliant contractor will eliminate the hazard completely. An unqualified one, on the other hand, could turn a dangerous situation into a catastrophic one.
Your search should start and finish with one absolute, non-negotiable credential: a Health and Safety Executive (HSE) license. Think of this as the UK’s official seal of approval. It proves a contractor has the training, equipment, and safety procedures needed to handle high-risk asbestos materials like those often found in ceilings.
Never, ever hire a company that can't show you a valid, current HSE license.
Vetting Your Potential Contractor
Beyond the license, a trustworthy contractor will be completely transparent and ready to provide paperwork to back up their claims. Treat it as a checklist for your own peace of mind. Before you agree to any work, make sure you've seen and verified the following.
- Proof of Insurance: Ask for a copy of their public liability insurance. Crucially, it must include specific cover for working with asbestos. Your average contractor's insurance won't cut it for asbestos-related incidents.
- Detailed Plan of Work: A professional outfit will give you a thorough written plan. It should outline exactly how they'll tackle your project, from setting up the enclosure right through to the final decontamination.
- References and Past Work: Don't be afraid to ask for testimonials or case studies from previous residential jobs. A reputable company will be proud to share their track record.
- Waste Carrier License: The contractor must hold an upper-tier waste carrier license to legally transport asbestos waste away from your property.
This vetting process is your first line of defence against rogue traders. They might tempt you with a low price, but that low price almost always means they're cutting dangerous corners. A cheap quote often points to inadequate safety controls, improper disposal, and a huge risk to your health.
For more tips on finding local professionals, you can explore our guide on searching for asbestos removal near you.
Understanding the Paperwork Trail
Proper documentation isn't just about ticking boxes; it's your legal guarantee that the job was done correctly and safely from start to finish. There's one document in particular that is absolutely essential.
The most critical piece of paperwork you must receive after the job is the Waste Consignment Note. This is your official, legal proof that the asbestos removed from your ceiling has been transported to and disposed of at a licensed hazardous waste facility. Without it, you have no evidence the waste wasn't illegally fly-tipped somewhere.
This note completes the chain of compliance, making sure every single fibre is accounted for. It protects you from any future liability and is a vital document to keep for your records, especially if you ever plan to sell your property. It proves you handled a serious hazard responsibly and in full accordance with UK law.
Any contractor who is vague about providing this note should be avoided at all costs.
Your Asbestos Ceiling Questions Answered
Dealing with a potential asbestos ceiling can feel overwhelming, and it’s only natural to have a lot of questions. Getting clear, straightforward answers is the first step to making safe, informed decisions for your home and family. Let's tackle some of the most common queries we hear from homeowners.
A question that comes up time and time again is whether there's an easier way out than full removal.
Can I Just Plaster Over an Asbestos Ceiling?
In a word, no. It’s a dangerous misconception that you can simply cover up the problem. Plastering over or encapsulating an asbestos ceiling might seem like a quick fix, but it doesn't make the hazard disappear. The asbestos is still lurking underneath, and any future work—even something as simple as installing a new light fitting or fixing a leak—could easily disturb the hidden materials and send dangerous fibres into the air.
Worse still, the very act of preparing the ceiling for plastering can disturb the original asbestos-containing material, releasing fibres before you’ve even started. It's a short-term patch that creates a long-term, hidden danger for you, your family, or anyone who works on the property down the line. Professional removal is the only way to genuinely eliminate the risk for good.
How Long Does Asbestos Ceiling Removal Take?
The timeline for a professional asbestos ceiling removal really depends on the size and complexity of the job. For a single, standard-sized room, you can generally expect the process to take between one and three days.
Here’s a rough breakdown of how that usually plays out:
- Day 1: The team arrives to set up the sealed enclosure and the negative pressure unit. This is critical for safety. The removal work will then begin.
- Day 2: Work continues to complete the removal, followed by the initial clean-down. An independent analyst is then called in for air monitoring.
- Day 3: Once the air test gives the all-clear, the team will carefully dismantle the enclosure and do a final clean-up, leaving the area safe.
Of course, larger projects will take longer, but your chosen contractor should give you a detailed schedule in their plan of work before they start.
What Paperwork Should I Keep After the Job is Done?
This is incredibly important. Having the right paperwork is your proof that the job was done safely, legally, and responsibly. You'll need it for your own records, and it’s essential if you ever decide to sell your property.
The single most important document you need to get your hands on after the job is finished is the Waste Consignment Note. This is your legal evidence that the hazardous asbestos waste from your property was taken away and disposed of correctly at a licensed facility. Don't let a contractor leave without giving you this.
Alongside the consignment note, you should also keep:
- A copy of the contractor's detailed plan of work.
- The clearance certificate from the independent air monitoring test, which officially confirms the area is safe to re-enter.
Keeping these three documents together gives you a complete, compliant record. It protects you from any future liability and provides total peace of mind that the job was done right.
If you think you might have an asbestos ceiling and need a safe, compliant disposal service you can trust, talk to the experts at The Waste Group. We provide fully licensed asbestos collection and disposal, making sure every single step is handled by the book. Learn more about our asbestos services and get a quote today.