A DIY Guide to Laying Self Binding Gravel Paths in Your UK Garden
A DIY Guide to Laying Self Binding Gravel Paths in Your UK Garden
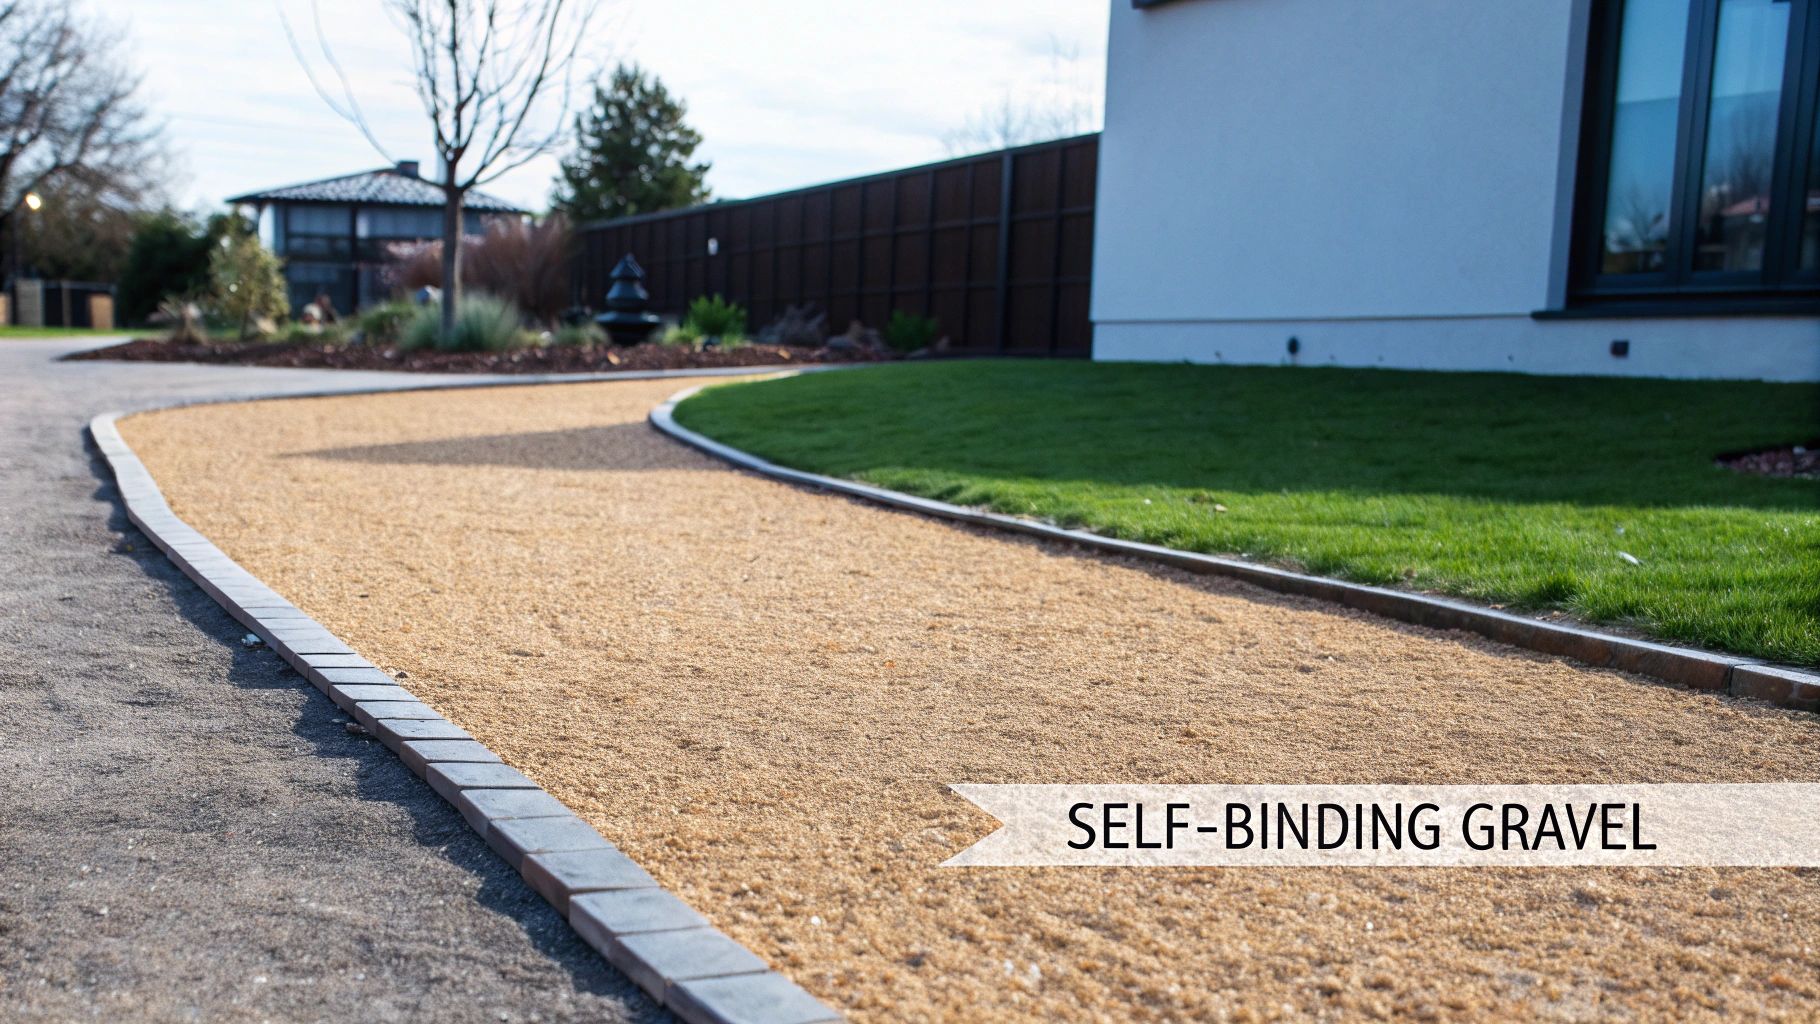
Self-binding gravel paths give you a firm, hard-wearing surface that has all the natural charm of loose gravel but with the stability of a much harder path. It’s made from a clever mix of gravel, sand, and clay, and this material compacts to create a solid finish. It's absolutely perfect for garden walkways, cycle routes, and seating areas where you're after that rustic, country feel.
Understanding Self Binding Gravel
You might have heard it called by its traditional name, 'hoggin'. Self-binding gravel is a unique material that has been used in British landscaping for generations. Its magic is all in the recipe: a carefully balanced blend of aggregates, dust, sand, and clay. When you add water and compact it, the tiny particles in the mix bind everything together, locking the larger stones in place to form a remarkably stable yet permeable surface.
This process creates a path that neatly sidesteps the usual headaches you get with loose decorative gravel. What you end up with is a firm walkway that’s comfortable underfoot and solid enough for wheelie bins, wheelbarrows, or even wheelchairs, without rogue stones making a break for your lawn. It perfectly bridges the gap between the casual feel of shingle and the hard lines of concrete or paving slabs.
Key Characteristics and Benefits
The appeal of a self-binding gravel path is about more than just its good looks. There are some real practical advantages that make it a smart choice for many UK gardens.
- Natural Aesthetic: Its earthy tones and textures blend beautifully into almost any garden, complementing plants and natural landscapes much better than stark, artificial surfaces.
- Permeability: A properly laid path lets rainwater drain straight through it and into the ground. This helps cut down on surface water runoff and stops puddles from forming, a huge plus in our famously damp UK climate.
- Firm and Stable Surface: Once it's compacted, the surface is solid and resilient. It gives you a reliable footing that doesn't shift or scatter everywhere like loose chippings tend to do.
- Cost-Effectiveness: When you stack it up against options like block paving or resin-bound surfaces, self-binding gravel is often much kinder on the wallet, both to buy and to install.
Its Place in Garden Design
Self-binding gravel is a really versatile player that fits into all sorts of garden styles, from rustic country cottages to more structured, contemporary layouts. It acts as a 'soft-hard' landscaping feature, defining different areas without creating harsh, unforgiving lines. To get a better sense of where these paths fit in, it’s worth brushing up on your understanding hardscape elements in landscaping.
This material is the ideal compromise. It delivers the satisfying crunch of gravel underfoot but with the stability needed for practical, everyday use, making it perfect for creating functional yet beautiful garden paths that feel completely integrated with their surroundings.
Ultimately, it’s a durable, attractive, and low-maintenance solution that carries on a long tradition in garden design while ticking all the modern boxes for sustainability and function. Its unique properties make it a real standout choice for anyone looking to create charming paths that will last for years.
Planning Your Path and Sourcing Materials
Before a single spade hits the soil, the success of your new path is decided by good planning. A well-designed self-binding gravel path doesn't just look better, it performs better and lasts for years.
The best way to start is by getting a feel for the route. Grab some rope or a garden hose and lay it out on the ground. This helps you visualise the final shape, whether you're after a dead-straight utility path or a gentle curve that meanders through the garden.
Think about how you'll use it. A main walkway to the shed or bins needs to be practical, wide enough for a wheelbarrow – about 1.2 metres is a good rule of thumb. A purely decorative path can be much narrower. Also, keep an eye on slopes. A gentle gradient is perfectly fine, but steep inclines can wash out during heavy rain.
Designing Your Path Layout
Once you're happy with the visual, make it official. Mark out the exact lines with stakes and string. This simple step is vital for getting your material quantities right and ensuring your edges are crisp and straight.
While you’re at it, do a quick but crucial safety check for any buried utilities. The last thing you want is to accidentally dig into a water pipe, electrical cable, or gas line. It’s always better to be safe than sorry.
This is also the time to think about the final look. Self-binding gravels have deep roots in British landscaping. Traditionally known as 'hoggin', they were made from local aggregates to create durable, natural-looking surfaces that blend beautifully with historic gardens and stand up to the UK’s wet climate. For anyone interested in the heritage of garden design, Historic England has some fantastic resources on traditional garden features.
Calculating Your Material Needs
With your path marked out, it’s time to do the maths. You'll need two main types of aggregate: a sub-base and the self-binding gravel for the top layer.
- The Sub-Base Layer: This is the unseen hero of your path. A solid foundation made of MOT Type 1 aggregate is absolutely essential for stability and drainage. For a typical garden path, you'll want a compacted depth of 100mm.
- The Top Layer: This is the self-binding gravel itself, which sits on top of the sub-base. A compacted depth of 50mm gives you a firm, long-lasting surface.
To calculate the volume you need, just multiply the path’s length by its width, then by the required depth for each layer. For example, a path that's 10m long by 1.2m wide needs 1.2 cubic metres of Type 1 (10 x 1.2 x 0.1).
Most suppliers sell aggregates by the tonne. A good rule of thumb is that 1 cubic metre is roughly 1.8 tonnes, but it's always best to confirm with your supplier. Whatever you do, add about 10% extra to your final order. This will cover you for compaction and any little miscalculations along the way.
Planning for site access is just as important as getting your quantities right. A bulk bag of aggregate is incredibly heavy and awkward. Make sure the delivery lorry can get close to your property and that you have a clear run to move the materials to where you'll be working.
Sourcing Your Aggregates and Supplies
Now you know what you need, it's time to get everything ordered. Your shopping list will be more than just gravel. You’ll need a tough, non-woven geotextile membrane to go between the sub-base and the top layer – it’s your best defence against weeds pushing through. You’ll also need some form of edging, whether it's timber, steel, or stone, to keep the path contained and looking sharp.
For the aggregates, local suppliers are often your best bet. A company like The Waste Group can deliver materials such as MOT Type 1 directly to your site in Dorset, usually in convenient bulk bags. Sourcing a high-quality sub-base is crucial for the longevity of your path. You can learn more about why it's so important in this detailed guide on Type 1 aggregate.
Getting all your deliveries and materials organised before you start makes the whole installation process run smoothly.
Before you place any orders, it’s a good idea to create a simple checklist. This makes sure nothing gets forgotten and you have everything you need on hand when installation day arrives.
Essential Materials and Tools Checklist
| Category | Item | Purpose |
|---|---|---|
| Aggregates | MOT Type 1 Sub-Base | Creates a stable, load-bearing foundation and aids drainage. |
| Self-Binding Gravel | The decorative top layer that compacts to a firm, natural surface. | |
| Path Structure | Geotextile Membrane | Suppresses weeds and prevents aggregates from mixing with the subsoil. |
| Edging (Timber, Steel, Stone) | Contains the gravel, defines the path edges, and provides structure. | |
| Stakes and String | For accurately marking out the path layout before excavation. | |
| Excavation Tools | Spade and Shovel | For digging out the path area to the required depth. |
| Wheelbarrow | Essential for moving soil, aggregates, and tools around the site. | |
| Compaction Tools | Wacker Plate/Compactor | For compacting the sub-base and top layer for a solid finish. (Can be hired) |
| Tamper | For compacting smaller areas or corners where a wacker plate can't reach. | |
| Spreading Tools | Rake | For levelling both the sub-base and the self-binding gravel layers. |
| Trowel | Useful for fine-tuning levels and working around edges. | |
| Finishing Tools | Spirit Level and Straight Edge | To ensure the path has the correct levels and falls for drainage. |
| Watering Can or Hose | For lightly spraying the self-binding gravel to aid compaction. | |
| Safety Gear | Sturdy Boots | Protects your feet during excavation and when using heavy equipment. |
| Gloves | Protects hands from blisters and abrasion when handling materials. |
Having all these items ready will save you countless trips to the DIY store and keep your project on track from start to finish.
A Practical Guide to Installing Your Gravel Path
With your design sorted and materials waiting, it's time to get your hands dirty and bring that perfect self binding gravel path to life. This is where the real work begins, and a bit of care and a methodical approach now will pay dividends for years to come.
The first job is always the excavation. This isn't just about digging a trench; it’s about creating a solid, well-drained foundation for everything that follows. Grab a spade, follow the line of your stakes and string, and start by lifting the turf and topsoil.
For a typical garden path, you'll want to dig down about 150mm (6 inches). This depth gives you enough room for a robust 100mm sub-base and a finished 50mm layer of the self-binding gravel itself.
Shaping the Foundations
As you dig, it pays to think about drainage. A pro trick is to create a subtle 'camber' – a slight dome shape where the path's centre is just a fraction higher than the edges. This encourages rainwater to simply run off the sides. A gentle fall of around 1 in 50 (that’s a 2cm drop for every metre of width) is all you need.
It's also crucial to prepare the ground properly to avoid problems down the line. A big part of this is understanding local frost depth, as the freeze-thaw cycle can make the ground heave and mess up your beautifully laid path.
Once you've reached your depth, level the bottom of the trench with a rake, pulling out any large stones or pesky roots. Then, get the wacker plate or hand tamper out and compact the soil. This simple step stops the ground from sinking later and creating dips in your path.
This quick graphic breaks down the planning stages that should happen before you even pick up a spade.
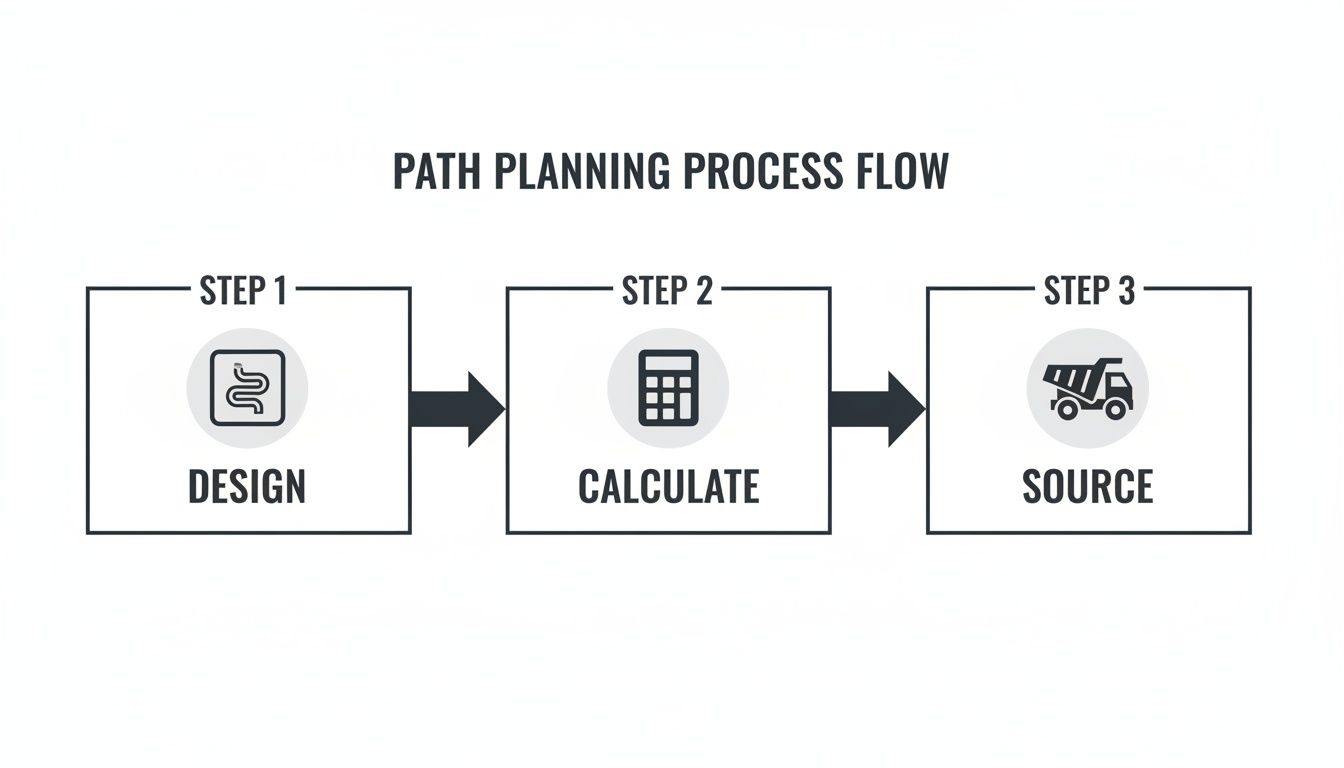
It’s a good reminder that a successful build is all down to smart design, accurate calculations, and getting your materials sourced and ready.
Installing Sturdy Edging
Groundwork done, it’s time to fit your edging. This isn't just a decorative touch; it's a vital structural element. Edging provides the lateral support that holds all the aggregates in place, stopping your path from crumbling and spreading out at the sides.
You’ve got a few options here, depending on the look you’re after:
- Timber Edging: Treated softwood or handsome oak gives a lovely rustic, natural feel. It’s pretty straightforward to install using wooden stakes to hold it firm.
- Steel Edging: A very popular modern choice. It gives you a crisp, almost invisible line that's incredibly tough and flexible enough to create beautiful, smooth curves.
- Brick or Paving Edges: These offer a classic, traditional border. For ultimate strength, you can set them in mortar.
No matter what material you pick, make sure the top of the edging sits at the final height you want for your path. Use a spirit level to check it's level along its length and has that slight fall across its width for drainage.
Building a Rock-Solid Sub-Base
Now for the unsung hero of your path: the sub-base. This is a layer of MOT Type 1 aggregate that provides all the load-bearing strength and, crucially, drainage. Skip this, and your path will quickly turn into a rutted, soggy mess.
Shovel the Type 1 into your trench and rake it out to a uniform depth of about 120mm. You need to start a bit deeper to allow for compaction. Getting your quantities right is important; you can get a feel for this by looking into how much space a tonne of aggregate occupies.
Pro Tip: Don't try to compact the sub-base in one go. Do it in two thinner 60mm layers. You'll get much better compaction this way, resulting in a far stronger and more stable foundation.
Once you've spread the first layer, run the wacker plate over it several times until it's solid. Then repeat with the second layer until you've got a compacted sub-base of 100mm.
Laying the Geotextile Membrane
Before you get to the exciting bit, there's one more job. Roll out your geotextile membrane over the sub-base. This fabric is your number one defence against weeds pushing through, and it also stops the fine particles of your gravel from washing down into the sub-base over time.
Cut the membrane to fit, making sure it covers the entire area and overlaps by at least 150mm at any joins. Let it run slightly up the inside face of your edging to create a complete, sealed tray.
Applying and Compacting the Final Layer
This is it – the final and most satisfying stage. The secret to a perfect self-binding gravel finish is to apply it in thin layers, add just the right amount of water, and compact it really well.
Start by spreading an even layer of the self-binding gravel over the membrane. Aim for a loose depth of around 70-75mm. Use the back of a rake to level it out; using the tines can pull the larger stones away from the fine binding dust.
Once it's level, give the surface a light spray with a fine mist of water from a hose or watering can. You're aiming for damp, not soaking wet. This moisture is what 'activates' the clay and dust, allowing it all to bind together.
Straight after watering, start compacting with the wacker plate. Be systematic, working from the edges of the path in towards the centre. You’ll see the fine particles rise to the surface as it compacts down to its final 50mm depth. If the gravel starts sticking to the plate, you've used too much water; if you're kicking up dust, it's too dry.
After that first compaction, give it one last, very light spray of water and go over it again with the wacker plate. This final pass is what creates that lovely smooth, tightly bound finish. Your new path is now complete! Just be sure to let it cure and harden for at least 24-48 hours before you start walking on it.
Maintaining Your Path for Long-Term Success

One of the best things about a self-binding gravel path is how it balances that lovely natural look with minimal fuss. Now that your path is properly laid, a little bit of routine care is all it takes to keep it looking great and working perfectly for years to come.
The good news is, the day-to-day upkeep is dead simple. It’s mostly about keeping the surface clear of things like fallen leaves, twigs, and grass clippings. This isn’t just for tidiness – if you let organic stuff rot down on the path, it creates a fine layer of soil that’s a perfect invitation for weeds and moss.
A stiff-bristled broom is your best friend here. A quick sweep every week or two is usually more than enough to keep your path looking spot on.
Routine Care and Refreshing the Surface
Over time, you might notice the very top layer of your path loosening up a bit, especially with heavy footfall or after a long, wet winter. Don't worry, this is completely normal and easy to sort out.
Giving it an occasional light going-over with a spring-tined rake helps to move the fine aggregate around and freshen up the surface. Follow that with a gentle spray from a hose and a quick pass with a hand tamper or roller, and you'll re-compact any loose bits, tightening the surface right back up.
Think of it like ironing a shirt. A little bit of pressure and moisture smooths everything out, restoring that crisp, tightly-bound finish your path had when it was first laid. This small effort every few months makes a huge difference.
Staying on top of this not only keeps the path looking its best but also stops small issues from turning into bigger headaches.
Troubleshooting Common Path Problems
Even the most perfectly laid path can run into minor issues, especially with our unpredictable UK climate. Luckily, most common problems are simple enough to fix yourself without calling in the professionals.
Here are a few things you might come across and how to handle them:
- Weed Growth: Even with a geotextile membrane, a few determined airborne seeds might decide to take root. They’re usually shallow-rooted, so you can often just pull them out by hand. For anything more stubborn, a weedkiller suitable for gravel paths will do the trick.
- Moss in Shady Spots: Damp, shady corners can be prime real estate for moss. Sweeping regularly helps prevent it, but if it does appear, you can tackle it with a proprietary moss killer or a good scrub with a stiff brush. Just be sure to avoid using salt, as it can mess with the binding properties of the gravel.
- Minor Potholes: A small dip might form in a high-traffic area or where water has been pooling. The fix is quick: clear out any loose bits from the hole, dampen the area, and top it up with a small amount of fresh self-binding gravel. Overfill it slightly, then compact it down firmly with a hand tamper until it’s perfectly level.
Rejuvenating Your Path with a Top-Up
Perhaps the biggest advantage of self-binding gravel is how incredibly forgiving and repairable it is. A cracked concrete or tarmac path is a major job to replace, but a tired-looking gravel path can be made to look brand new. With proper care, these paths can last 15-25 years in the UK with very little work. This fantastic durability, often championed by heritage bodies, is down to the simple but effective top-up method. You can find out more about the long-term benefits and repairability from experts in aggregate supply.
If, after many years of use, your path starts to look a bit thin or worn, a fresh top-up layer is all it needs. Simply order a small amount of the same self-binding gravel, spread a thin 20-25mm layer over the existing surface, give it a light watering, and compact it thoroughly.
This process gives you what is essentially a new path for a tiny fraction of the original cost and effort. Sourcing more aggregate is easy, with suppliers like The Waste Group able to deliver exactly what you need to bring your path back to its former glory. This cost-effective longevity makes self-binding gravel a truly smart and sustainable choice for any garden.
Why Self Binding Gravel Is a Smart and Sustainable Choice

Choosing what to build your garden path with goes way beyond just how it looks. Of course, you want something that looks the part, but the real test of a smart choice is how it performs over time, both for your wallet and the planet.
When you start comparing materials, self-binding gravel really stands out, especially when you put it up against impermeable surfaces like asphalt, concrete, or paving slabs. The initial cost is often a pleasant surprise, but the genuine savings pop up year after year.
The Financial Advantage
Right out of the gate, the materials and labour for a self-binding gravel path are usually kinder on the budget than hard paving. But the real win is how little it asks for in the long run.
Concrete cracks and tarmac eventually breaks down, leading to expensive, professional repairs or even a complete rip-out-and-replace job. A self-binding path, on the other hand, can be brought back to life with a simple top-up of fresh gravel. It’s cheap, it’s easy, and it means the total cost of ownership over a decade or more is incredibly low.
A Greener Footprint from Day One
The environmental case for self-binding gravel is even more compelling. One of its biggest strengths is its permeability, and in a country that gets its fair share of rain, that’s a massive plus.
Hard, non-porous surfaces are a major cause of overloaded drains and localised flooding. Self-binding gravel does the opposite. It lets rainwater soak straight through into the ground, just as nature intended, helping to recharge groundwater tables and reduce runoff.
This quality makes it a perfect fit for Sustainable Drainage Systems (SuDS) principles, marking it as a truly responsible choice for any modern garden.
What's more, studies have shown that self-binding gravel has a lower environmental impact than asphalt over its entire life, even when you factor in 20 years of maintenance. An in-depth comparison found that even with annual top-ups, a gravel path's carbon footprint remains smaller than an asphalt one.
You can boost your path's green credentials even further right from the build stage. The sub-base, the foundation of your path, can often be made using recycled MOT Type 1 aggregate. Using recycled materials is a double win: it keeps waste out of landfill and cuts down on the need for new quarrying.
This combination of a permeable top layer and a recycled base is at the heart of eco-friendly landscaping. For anyone keen on building with sustainability in mind, we've got more ideas in our guide to using sustainable materials for construction projects.
So, by choosing self-binding gravel, you’re not just getting a beautiful, practical path. You’re making a choice that’s better for your bank balance, better for managing water, and ultimately, much better for the environment.
Your Questions Answered: Self Binding Gravel Paths
Even with the best guide, a few questions always pop up once you get your hands dirty. Getting the right answers can be the difference between a minor hiccup and a major headache. Let’s tackle some of the most common queries we hear about building and living with self binding gravel paths.
Think of this as your quick-fire troubleshooting guide. We'll cover everything from how they handle a classic British downpour to whether you can park your car on one.
How Permeable Is a Self Binding Path?
This is a big one, especially in the UK. Will my lovely new path turn into a muddy puddle after the first heavy rain? The short answer is no; they are designed to be permeable.
A properly laid self-binding gravel path lets water filter through its surface into the compacted sub-base below, which then allows it to soak away naturally into the ground. It’s not quite as free-draining as, say, a trench filled with loose 20mm shingle, but it's more than capable of handling typical rainfall without any issues. The real magic happens when you combine it with a solid MOT Type 1 sub-base and a very slight camber (a gentle arch) on the surface. Together, they manage water beautifully, making it a great choice for Sustainable urban Drainage Systems (SuDS).
You can think of a well-laid self binding path as a tough, stable sponge. It soaks up rain at a controlled pace, stopping water from flooding your garden or running straight into the street—a huge advantage over impermeable surfaces like concrete or tarmac.
Can I Use Self Binding Gravel for a Driveway?
We get asked this a lot, and it's a crucial point to get right. While these paths are incredibly tough for foot traffic, wheelbarrows, and the occasional light bit of garden machinery, we generally do not recommend them for a domestic driveway that gets regular use from cars.
The problem isn't so much the weight of the car but the specific forces the tyres exert. When you're parking, the twisting and scuffing motion from turning the steering wheel can easily break up that tightly bound surface. This will quickly create ruts, loose patches, and potholes, wrecking the smooth, smart finish you worked so hard for.
For areas with frequent vehicle traffic, you really need a more robust solution designed for the job. Consider looking into:
- Resin-bound gravel systems
- Block paving
- Reinforced paving grids for grass or gravel
These alternatives are built to handle the unique stresses of vehicle movement and will keep your driveway looking good for years to come.
How Do I Fix a Small Pothole?
Seeing a small dip form in your path can be frustrating, but the good news is that it's one of the easiest repair jobs going. This is a massive plus point compared to solid surfaces.
First, grab a small trowel or a stiff brush and clear out all the loose material, weeds, and general muck from the hole. You need to get right back down to the solid, compacted layer beneath.
Next, lightly dampen the inside of the hole and the area just around it with a watering can. This just helps the new gravel bind properly to the existing path. Shovel in a small amount of fresh self-binding gravel, overfilling it slightly to allow for compaction.
Finally, give the new material a light spray with water until it’s damp through, and then compact it down firmly. A hand tamper is ideal, but the end of a chunky piece of timber will do the trick. Just keep tamping until the patch is solid and perfectly flush with the surrounding path.
Is Edging Really Necessary?
In a word, yes. We can't stress this enough. While you could lay a path without any edging, it's a false economy that will only create more work for you down the line. Edging isn't just for looks; it's a vital part of the path's structure.
It provides crucial lateral support, holding the sub-base and gravel layers firmly in place. Without that containment, foot traffic and weather will slowly but surely cause the edges to crumble and spread. This leads to a messy, undefined look, a weaker path, and the never-ending chore of sweeping gravel off your lawn or out of your flowerbeds. A solid edge—whether it’s made from timber, steel, or stone—is the secret to a sharp, professional, and long-lasting finish.
Ready to get your project started with the best materials? The Waste Group offers dependable delivery of high-quality aggregates, including MOT Type 1 for your sub-base, right across Dorset. You can plan your path with complete confidence, knowing you've got a trusted local supplier sorted. Explore our aggregates delivery services today.