Build a Durable Self Binding Gravel Pathway
Build a Durable Self Binding Gravel Pathway
A self-binding gravel pathway gives you a firm, stable surface that just melts beautifully into a natural landscape—a world away from loose, shifting stones. Its unique mix of gravel, sand, and clay fines locks together tightly when compacted. The result is a durable yet permeable finish that’s absolutely perfect for UK gardens, driveways, and even heritage sites.
What Exactly Is Self-Binding Gravel?
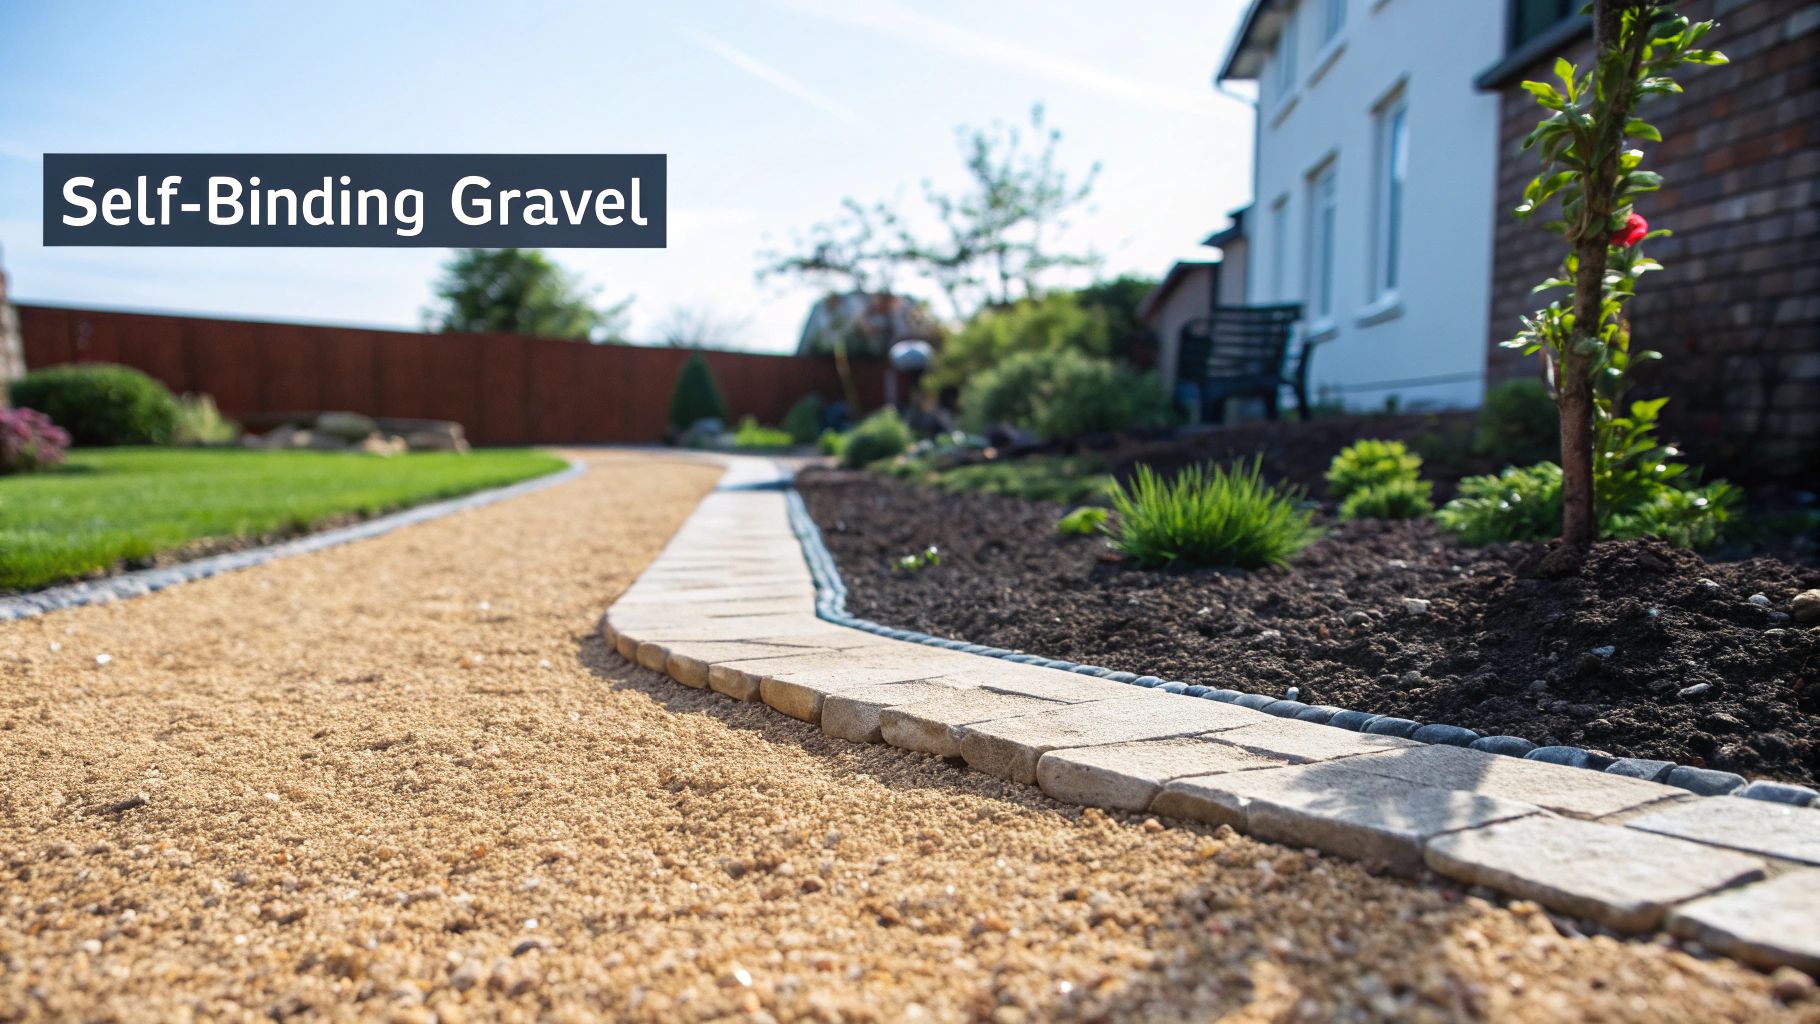
Before you start digging, it helps to get your head around what makes this material different from the usual suspects like loose shingle or hard paving. A self-binding gravel pathway isn't just a pile of stones; it’s a carefully engineered mix designed to perform. The real magic is in the blend of different sized aggregates, from small stones right down to clay and silt fines.
When you add a bit of water and compact these layers, those tiny fines act like a natural cement, binding the larger stones into a solid mass. This clever process creates a surface that feels solid underfoot but still lets water drain through, preventing puddles and reducing run-off.
A Traditional and Sustainable Choice
This material has a long and noble history in British landscaping. Traditionally known as 'hoggin', it was the go-to choice for Victorian park footpaths and grand carriage drives because it struck the perfect balance between firmness and permeability. This long-standing reputation makes it ideal for projects where you want a classic, natural feel.
The key benefit is creating a surface that feels established and organic, unlike the stark, fresh look of concrete or asphalt. It settles into the landscape, offering a timeless appearance that works with both traditional country gardens and sleek, contemporary designs.
Key Advantages for Your Project
Opting for a self-binding gravel path comes with some fantastic benefits:
- Natural Appearance: The earthy tones and textured finish blend in seamlessly with lawns, flower borders, and any natural surroundings.
- Firm and Stable Surface: Once it's properly compacted, it’s solid enough for wheelchairs, pushchairs, and wheelbarrows, making it far more accessible than loose gravel.
- Excellent Drainage: Its semi-permeable nature is brilliant for managing rainwater, easing the burden on your home's drainage systems.
- DIY-Friendly Installation: With the right prep work and a few essential tools, laying a self-binding path is a very manageable project for a confident DIYer.
Getting your aggregates delivered and the excavated soil taken away can be a real headache, but dedicated services can make it simple. Streamlining these logistics from the get-go ensures your project runs smoothly. For more on managing your materials in an eco-friendly way, you might find our guide on the recycling of aggregates useful.
Planning Your Pathway and Gathering Materials
Every great self-binding gravel path starts long before you pick up a shovel. It begins with a solid plan. Taking a bit of time to properly map things out and calculate what you need is genuinely the most important step for a professional, long-lasting finish.
Start by marking out the exact route of your path. A garden hose is great for playing with curves, while stakes and string are perfect for straight lines. Walk the route a few times. Does it flow naturally? Is it wide enough for a wheelbarrow to get down? A typical garden path is around 1.2 metres wide, which is usually enough for two people to walk side-by-side, but feel free to adjust this for your own space. Once you’re happy with the layout, you can get the measuring tape out and start crunching the numbers.
Calculating Your Material Needs
Getting your quantities right is crucial. Order too little, and your project grinds to a halt while you wait for another delivery. Order too much, and you're just wasting money and creating a disposal headache for yourself. You’ll need to figure out the volume for two key materials: your sub-base and the self-binding gravel itself.
A solid foundation is absolutely non-negotiable. For a standard footpath, you'll need a sub-base layer of MOT Type 1 aggregate that’s at least 75-100mm deep. On top of that, your self-binding gravel should be laid to a final, compacted depth of about 50mm.
To work out the volume you need for each layer, the formula is simple:
Length (m) x Width (m) x Depth (m) = Volume (m³)
So, for a path that's 10 metres long and 1.2 metres wide with a 100mm (that's 0.1m) sub-base, you'd calculate: 10 x 1.2 x 0.1 = 1.2m³ of MOT Type 1. You'd then do the same calculation for your 50mm (0.05m) layer of self-binding gravel. If maths isn't your strong suit, online tools like a pebble coverage calculator can be a massive help for double-checking your figures.
Don’t forget about the soil you’ll be digging out! A trench just 150mm deep generates a surprising amount of waste. Planning ahead for its removal with a skip hire service will save you from having a mountain of earth sitting on your lawn for weeks. It’s also smart to know the rules; learn more about the correct disposal of soil to make sure you're handling it properly.
Choosing Your Edging and Tools
Edging is what holds everything together, keeping the aggregate contained and giving you that crisp, neat finish. It stops the gravel from spilling over into your lawn or flowerbeds, and the material you pick will have a big impact on the final look, durability, and cost of your project.
To help you decide, here’s a quick rundown of the most common options.
Choosing the Right Edging for Your Gravel Pathway
| Edging Material | Aesthetic Appeal | Durability | Typical Cost | Installation Ease |
|---|---|---|---|---|
| Timber Sleepers | Rustic, natural look that softens with age. | Good, but will eventually rot without treatment. | Moderate | Relatively easy |
| Steel Edging | Sleek, modern, and almost invisible. | Excellent, very long-lasting. | High | Moderate |
| Brick or Stone | Classic, traditional, and versatile. | Excellent, extremely durable. | Moderate to High | Difficult |
| Plastic Edging | Inexpensive and flexible for curves. | Fair, can become brittle over time. | Low | Easy |
Each material has its pros and cons, so think about the style you're aiming for and how much work you're prepared to put in. Steel offers a sharp, contemporary look, whereas timber sleepers are perfect for a more traditional, cottage-garden feel.
Finally, get your tools assembled. You don’t need a massive workshop, but having the right gear on hand makes the job so much smoother. You will absolutely need a sturdy spade, a wheelbarrow, a rake, and a spirit level. For a truly professional finish, hiring a vibrating plate compactor (often called a ‘wacker plate’) is a must. It's the only way to properly compact both the sub-base and the final gravel layer to get that solid, durable surface.
Creating a Rock Solid Foundation
The long-term success of your self-binding gravel path hinges entirely on what’s underneath. If you skimp on this stage, you’re just setting yourself up for a lumpy, sinking mess in a year’s time. A truly durable surface starts with a meticulously prepared foundation, so this is where you want to put in the time and effort.
Your first job is to excavate the area you’ve marked out. For a typical garden path, you'll need to dig down to a depth of around 150mm (that’s about 6 inches). This depth gives you enough room for a robust sub-base and the final gravel layer, creating a solid structure that can handle foot traffic and the lovely British weather without shifting.
This simple infographic breaks down the core planning stages you need to nail before you even think about digging.
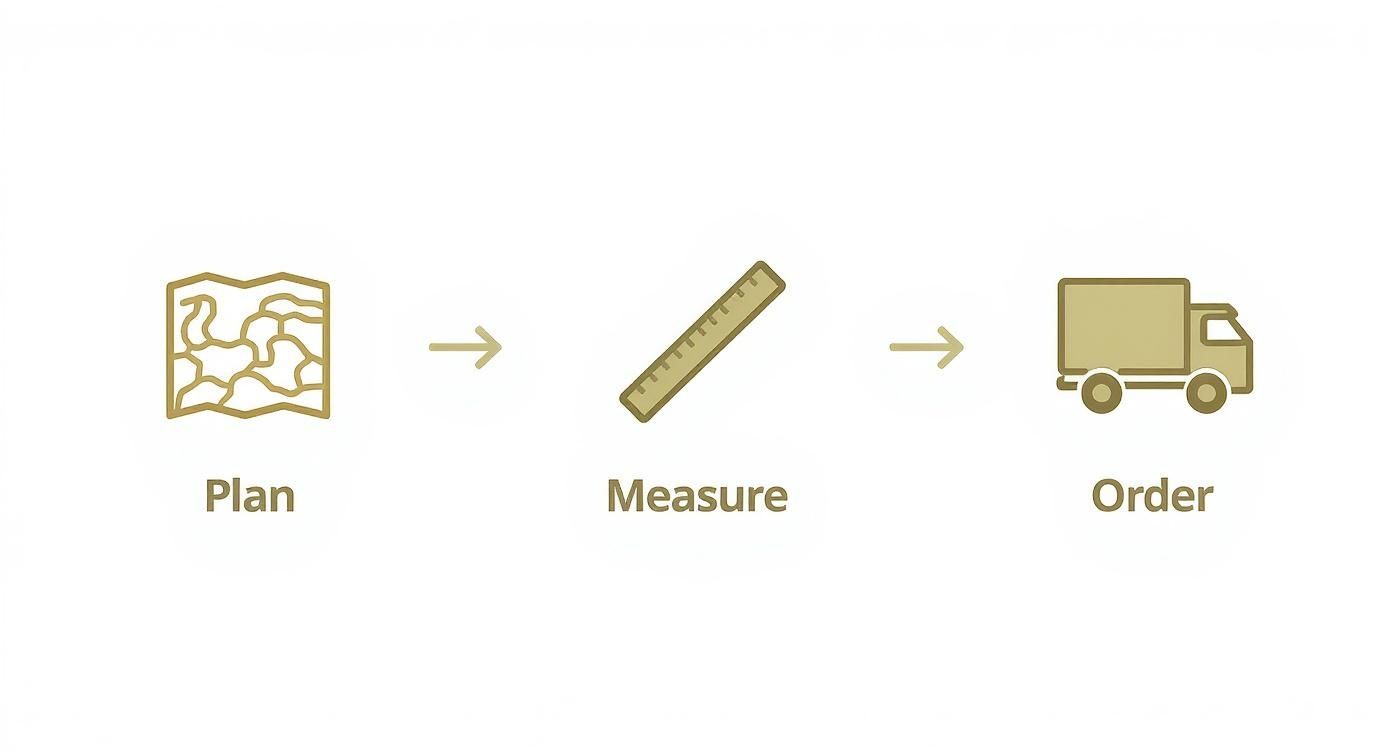
As this visual guide shows, getting your planning, measuring, and ordering sorted from the get-go is the secret to preventing costly mistakes down the line.
Engineering Effective Drainage
One of the most overlooked but crucial steps is building a slight camber into your foundation. A camber is just a gentle arch across the width of the path, making the centre slightly higher than the edges. A fall of around 1 in 40 (or a 2.5cm drop for every metre of width) is perfect.
This subtle slope is barely noticeable to walk on, but it’s incredibly effective at shedding rainwater off to the sides instead of letting it pool in the middle and cause problems.
With the trench dug and shaped, the next layer is non-negotiable: a high-quality, non-woven geotextile membrane. This fabric is your best defence against weeds. It creates a physical barrier that stops them from pushing up from the soil below, while still allowing water to drain through freely.
Lay the membrane across the entire base of the trench, making sure it runs up the sides of your excavation as well. Overlap any joins by at least 150mm to prevent determined weeds from finding a gap. This simple step will save you countless hours of weeding later.
Building Up the Sub-Base
Now for the structural heart of your path—the sub-base. The most common and effective material for this job is MOT Type 1, a graded crushed aggregate that compacts brilliantly to form a solid, free-draining layer. For a deep dive into this essential material, our guide on understanding Type 1 aggregate is a great resource.
The secret to a rock-solid foundation is to build it up in thin layers. Don’t just dump all the sub-base in at once.
- Start by adding a layer of MOT Type 1 about 50mm deep.
- Rake it out evenly across the entire area.
- Compact this layer thoroughly with your wacker plate until it’s solid.
- Repeat this process until you have a compacted sub-base of around 100mm.
Here’s a great pro tip: lightly spray the aggregate with a hose before compacting. The moisture helps the particles lock together more tightly, giving you a much firmer finish. Keep your spirit level handy throughout this process to check for an even surface and maintain that all-important camber.
Of course, when you're building the essential border or sub-base for your path, you might hit materials tougher than just soil and gravel. To ensure a robust structure, it’s worth knowing how to choose the right drill bits for concrete. Your finished sub-base should be so solid that you can walk on it without leaving an impression. That’s when you know it's done right.
Laying and Compacting Your Gravel Surface
With a perfectly prepared foundation, you’re now at the most satisfying part of the project—laying the gravel itself. This is where your pathway really starts to take shape, but your technique here is vital for getting that desirable, hard-wearing finish.
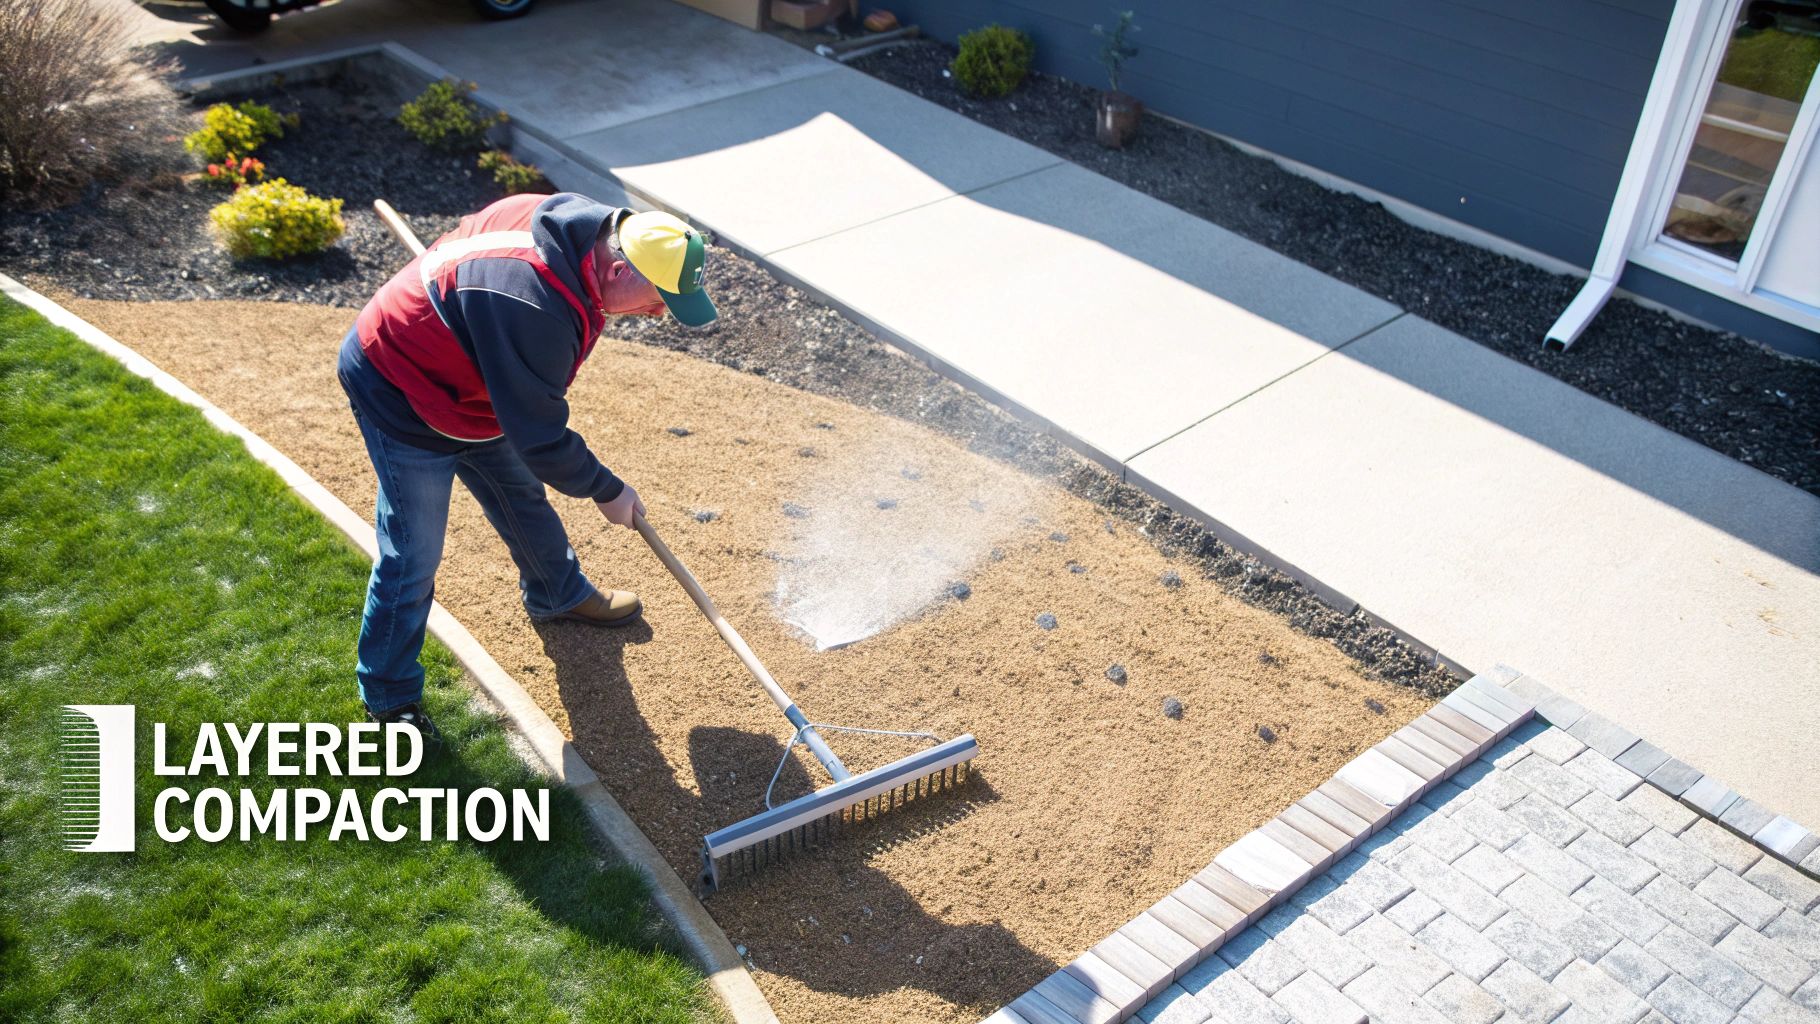
It’s tempting to just dump all your gravel in one go, but resist that urge. A single, thick layer is almost impossible to compact evenly and often results in a soft, spongy surface that won’t last. The professional approach is to work in two thinner layers, making sure each one is perfectly consolidated before you add the next. It takes a little more time, but this method guarantees a robust path that will stand up to years of use.
Applying the First Layer
Get started by spreading your first layer of self-binding gravel to a loose depth of around 50mm. I find it easiest to use a wheelbarrow to drop small piles along the path, then grab a rake to level it all out.
Here’s a tip: use the back of the rake for this job. If you use the tines, you risk dragging the larger stones to the surface and separating them from the essential fine material that helps it all bind together.
Once this first layer is spread evenly, it’s time to bring in the wacker plate. Move slowly and methodically up and down the length of the path, overlapping each pass slightly. You’ll actually see the surface tighten and firm up as you go. Don’t rush this bit; thorough compaction is the secret to a professional result.
Adding the Final Surface
With the first layer feeling solid underfoot, you can now add the second and final layer. This one should be spread to a loose depth of about 25mm. This brings your total loose depth to 75mm, which will compact down nicely to the target finished depth of approximately 50mm.
Rake this top layer level, again using the back of the rake to maintain that even mix of aggregate and fines. Double-check that your camber is still present, making any minor adjustments to ensure water will run off effectively. A little attention to detail now prevents puddles and potential washouts later on.
The composition and application of self-binding gravel paths in the UK are carefully calibrated to balance durability with drainage. Installation usually involves embedding the gravel to create a semi-natural path resilient to wear. For instance, in locations with poorer drainage like northern England's peaty soils, self-binding gravel has enabled the creation of successful bridleways where other surfaces would fail. Discover more insights about sustainable path surfaces from The British Horse Society.
Activating the Fines and Final Compaction
Now for the final, crucial step: activating the binding agents that give this material its name.
Using a hosepipe with a fine rose attachment, lightly spray the entire surface with water. You aren’t trying to flood it, just get it consistently damp. This moisture is what activates the natural clay fines, effectively turning them into a natural cement that will lock everything together.
Immediately after dampening, go over the entire surface one last time with the wacker plate. As you compact, you’ll see the fines rise to the surface, creating that smooth, tightly knit finish you’re after. The job’s done when you can walk on the path without leaving footprints and the stones are firmly locked in place.
Finishing Touches and Long-Term Care
Your new self-binding gravel path is down, compacted, and looking the part. But the job isn't quite finished. These final steps are what really lock in that professional finish and guarantee your path stands the test of time.
The most crucial thing you need right now is a bit of patience. After that final pass with the wacker plate or roller, the surface needs time to cure. The water you added has activated the clay fines, and they need a few days to work their magic, setting hard and binding all the aggregate particles together.
Try your best to keep everyone off the path for at least 24-48 hours. This curing window is non-negotiable if you want that tough, durable surface. Walking on it too early will only disrupt the bond, creating weak spots and leaving lasting footprints.
A Simple Maintenance Routine
One of the real beauties of a self-binding gravel path is just how low-maintenance it is. A little bit of attention now and then is all it takes to keep it looking pristine and performing perfectly.
A straightforward routine is all you need:
- Regular Brushing: Grab a stiff broom and sweep away any fallen leaves, twigs, or other garden debris. This stops a damp, mulchy layer from forming, which is a perfect breeding ground for moss and weeds.
- Weed Management: Your geotextile membrane will stop weeds from pushing up from underneath, but you might get the odd airborne seed trying its luck on the surface or at the edges. The good news is they'll be very shallow-rooted and incredibly easy to pull by hand or flick out with a hoe.
- Annual Top-Up: After a few years of foot traffic and weather, you might notice the very top surface wearing a little thin. A light top dressing of fresh self-binding gravel, dampened and compacted, will have it looking brand new again.
Handling Minor Repairs
Even the best-laid path can develop a small pothole or a worn patch over time, especially in high-traffic areas like the approach to a door or a sharp corner. Thankfully, sorting it out is incredibly simple.
There's no need to start ripping everything up. To fix a small depression, just grab a rake and scarify the surface to loosen it up. Add a scoop of fresh self-binding gravel, give it a light sprinkle from a watering can, and then re-compact it. A hand tamper is ideal for these little patch jobs, blending the repair seamlessly with the rest of the path.
This easy repairability is a massive advantage over surfaces like concrete or asphalt. Those materials often require expensive, disruptive, and obvious-looking patch-ups. Being able to just add and re-compact material makes self-binding gravel a far more sustainable and user-friendly choice for the long haul.
It's a much kinder approach to the environment, too. While an asphalt surface might last 15-25 years before needing a complete, resource-intensive replacement, a self-binding gravel path can be maintained pretty much indefinitely. By simply retaining the sub-base and topping up the surface, you drastically reduce your carbon footprint over the path's lifetime. You can explore more on this topic in this great article about making sustainable material choices from Marian Boswall Landscape Architecture.
Still Have Questions About Self Binding Gravel?
It's completely normal to have a few questions rattling around before you start digging up your garden. Getting clear answers now can save a lot of headaches later and give you the confidence to get stuck in.
Let’s go through some of the most common queries we hear from people planning their own pathway.
Is Self-Binding Gravel Permeable?
This is a great question. A self-binding gravel path is best described as semi-permeable. While it compacts down to a solid, firm surface, the natural mix of stone, sand, and fines still allows a fair bit of water to drain through.
This gives it a real environmental edge over totally sealed surfaces like concrete or asphalt, which cause instant water run-off and can make localised flooding worse. To get the best drainage possible, make sure you build in that slight camber (the gentle arch we talked about) and lay it on a properly compacted, free-draining sub-base.
Can I Lay a Self-Binding Pathway on a Slope?
Yes, you absolutely can on gentle slopes, but it does need a bit of extra planning. The biggest enemy on any kind of incline is erosion – a heavy downpour can wash away the fine binding particles and start to break up the surface.
For a path with a moderate slope, a simple and effective trick is to install 'check dams'. These are just small timber or stone barriers placed across the path every so often. They work like mini-steps, slowing the flow of water right down and stopping the gravel from being washed downhill.
On steeper gradients, anything more than a 1-in-15 rise, self-binding gravel probably isn't your best bet. The battle against erosion on very steep inclines can become a constant, frustrating problem that's difficult to get on top of.
How Do I Stop Weeds Growing Through?
The best way to deal with weeds is to stop them before they even start. Laying a high-quality, non-woven geotextile membrane between the soil and your sub-base is non-negotiable. This creates a tough physical barrier that stops weeds from ever pushing up from below.
Of course, some airborne seeds might land and sprout on the surface over time, but their roots will be incredibly shallow. This makes them easy to pull out by hand or get rid of with a stiff brush. We'd strongly advise against using chemical weed killers, as they can break down the natural binding agents in the gravel and weaken the path's surface.
What's the Difference Between Self-Binding and Loose Gravel?
The one-word answer? Stability.
Loose gravel is exactly what it sounds like – a pile of individual stones that will always move, crunch, and scatter when you walk on them.
Self-binding gravel, on the other hand, is a cleverly designed product. It contains a precise mix of different stone sizes, right down to fine dust and clay. When you dampen and compact it, these fine particles act like a natural cement, locking all the bigger stones together. The result is that solid, stable surface that’s firm enough for wheelchairs and pushchairs, without all the mess of loose stones.
Ready to turn your plans into reality? The Waste Group offers reliable aggregate delivery and skip hire services across Dorset, making your pathway project as simple and efficient as possible. Plan your project with us today.