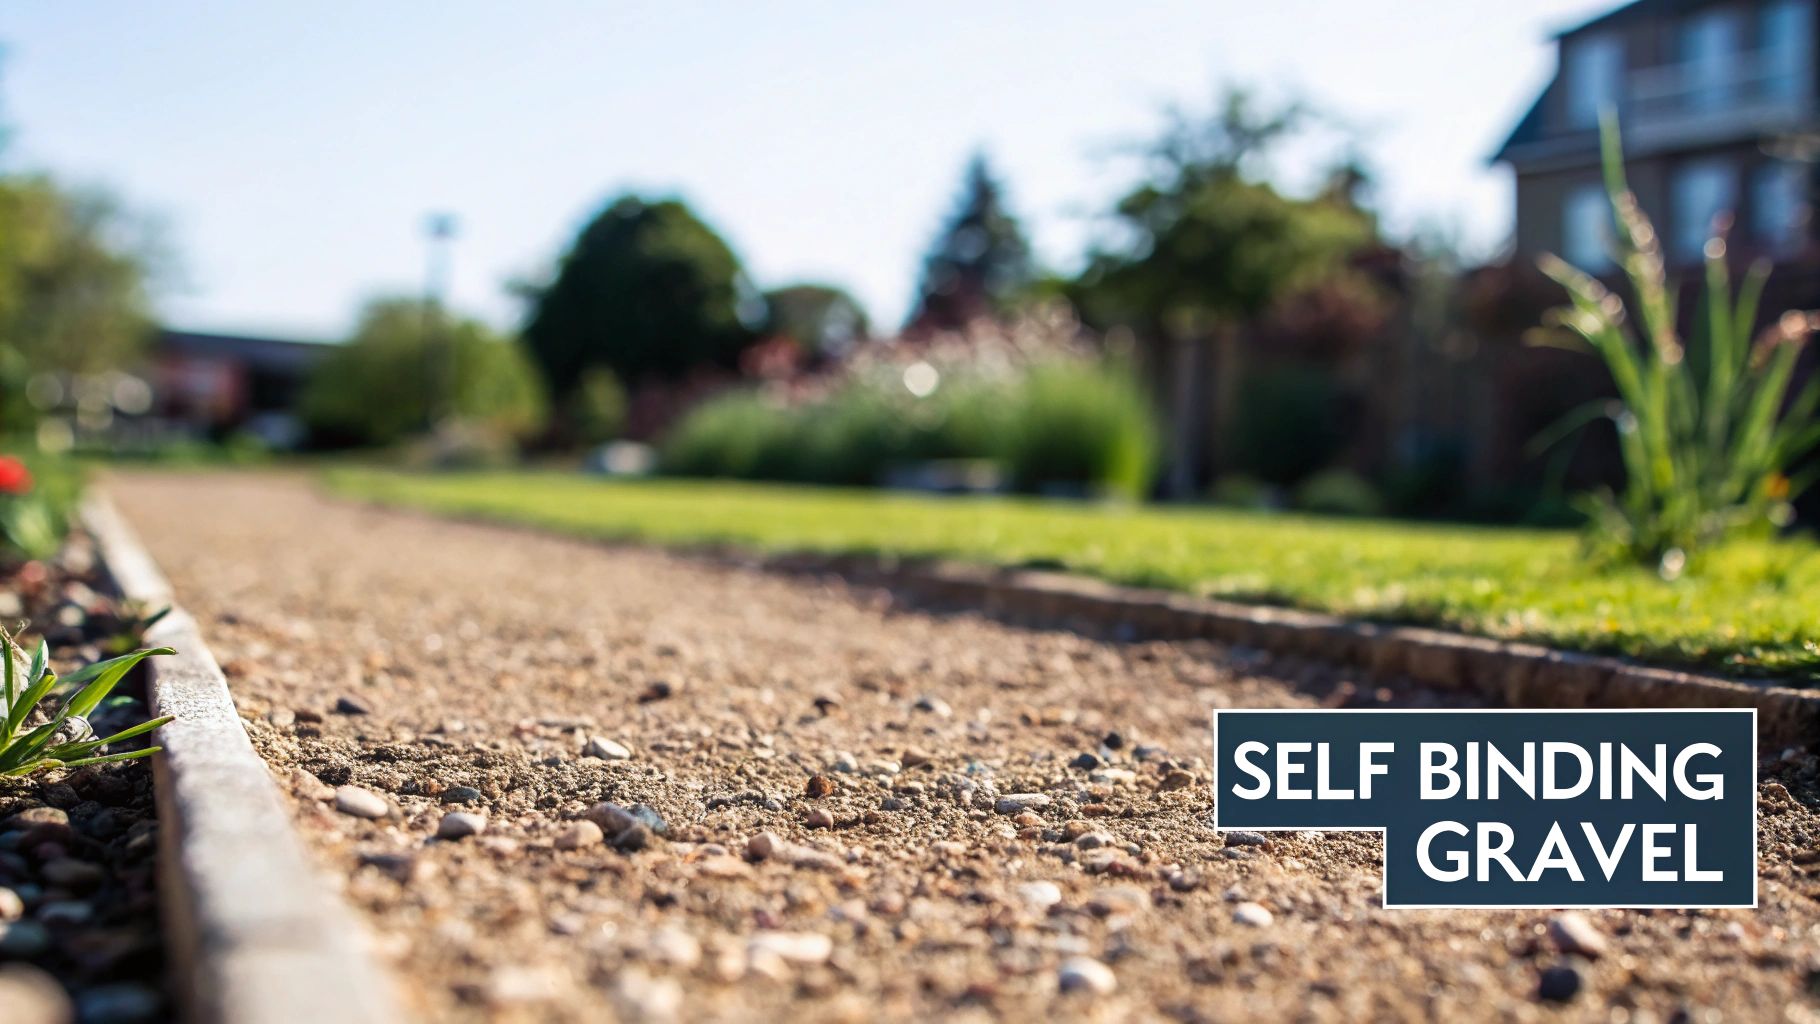
A Practical Guide to Self Binding Path Gravel
A Practical Guide to Self Binding Path Gravel
Self-binding path gravel is a fantastic surfacing material that’s a real blend of art and science. It’s made up of gravel, sand, and fine clay particles that, when compacted, create a firm and wonderfully natural-looking surface. Unlike the loose decorative stones that can scatter everywhere, this special mix is designed to bind together when you add a little water and pressure. This creates a stable, semi-permeable pavement that looks right at home in all sorts of settings, from rustic garden paths to grand estate driveways.
Understanding the Magic Behind the Mix
Think of it like baking a cake. If you only used flour (which is like loose gravel), you’d just have a pile of dust. But once you add the eggs and butter (the sand and clay), everything holds together beautifully. It’s the same idea here – self-binding gravel is a carefully balanced recipe of different-sized aggregates designed to create a solid, stable finish.
When you lay the gravel, give it a light watering, and then compact it with a roller or a whacker plate, something special happens. The larger stones provide the main structure, while the smaller sand and clay particles work their way into all the tiny gaps between them. This interlocking process creates a dense, solid surface that’s surprisingly firm to walk on, yet keeps that soft, organic look that blends so well into natural landscapes.
The Key Components
To really get why it works so well, let’s have a quick look at the ingredients in the mix:
- Gravel Aggregate: This is the backbone of the path, giving it strength and texture. The stones are usually up to 10mm in size.
- Sand and Grit: These medium-sized particles start to fill the gaps, acting as a vital bridge between the biggest and smallest elements.
- Clay Fines: Here’s the secret ingredient. These microscopic particles get sticky when they’re damp, acting as a natural "glue" that binds the whole mixture together into a durable crust.
A Nod to Landscaping History
This clever material is far from a new invention. In fact, self-binding gravel, often known by its traditional name 'hoggin', has been a cornerstone of British landscaping for well over a century. Dig into the history books, and you'll find that by the late 19th century, hoggin paths were a feature in over 70% of major public parks and gardens across England, including many now looked after by the National Trust. You can discover more insights about this historic pathway material and its modern uses.
This time-tested solution was the go-to choice for its durability on everything from busy park footpaths to grand carriage drives. It offered a sophisticated yet practical surface long before modern materials like tarmac became common. Its lasting popularity really speaks volumes about just how effective and timeless it is for creating classic, functional outdoor spaces.
Choosing Self Binding Gravel: The Pros and Cons
Picking the right surface for a path, drive, or patio means balancing looks, performance, and upkeep. Self binding path gravel makes a strong case for itself, but just like any material, it has its unique strengths and weaknesses. Taking a good, honest look at both sides is the only way to know if it’s the right fit for your project.
Its biggest pull is its natural look. Forget the harsh, artificial feel of tarmac or concrete; self binding gravel gives you a much softer, organic finish. The earthy tones, from warm golds to cool greys, blend seamlessly into gardens, heritage properties, and country settings. It creates a surface that feels like it belongs there, rather than one that’s been forced upon the landscape.
The Clear Advantages of a Bound Surface
One of the best things about it is the firm, stable surface it creates. Loose gravel shifts under your feet and can be a real pain for pushchairs, wheelchairs, or bikes. A properly compacted self binding path, on the other hand, is solid and dependable. You get all the rustic charm of gravel without the wobbly instability, making it a far more practical choice for daily use.
Beyond its good looks, it’s also a budget-friendly option. It’s generally cheaper to buy and install than alternatives like resin-bound surfaces or block paving. This makes it a fantastic choice for large areas, like long driveways or sprawling garden paths, where costs can quickly spiral.
What’s more, its semi-permeable nature is a huge environmental win. When laid correctly over a proper sub-base, it lets rainwater drain through the surface and back into the ground. This helps to:
- Reduce surface water runoff, which can overwhelm drains and lead to local flooding.
- Replenish the natural groundwater table, which is great for the local ecosystem.
- Align with Sustainable Drainage Systems (SuDS), a big tick in the box for modern landscaping and construction.
This sustainable feature really sets it apart from non-porous surfaces like asphalt. Many of the aggregates used can also come from recycled sources, giving their green credentials another boost. You can learn more about the benefits of using recycled aggregates and their growing importance in construction.
Considering the Potential Drawbacks
Of course, no material is perfect. The biggest potential pitfall with self binding path gravel is that its success hinges entirely on getting the installation right. If the sub-base isn't solid, the compaction is weak, or the drainage is an afterthought, you're asking for trouble. Heavy rain on a slope can cause washouts if the surface doesn’t have a slight camber and proper edging to control the water flow.
Maintenance is another thing to think about. While it's often called low-maintenance, it’s definitely not no-maintenance. Over time, the surface will need a bit of TLC to keep it looking its best. This might mean sweeping away leaves and debris to stop weeds from taking hold, and occasionally topping up and re-compacting small patches that have worn down or turned into potholes.
Finally, there’s a small chance of fine particles being tracked indoors on shoes. This is most common in the first few weeks after it’s been laid, or during very dry, dusty weather. It usually settles down as the surface beds in, but it’s a practical point to keep in mind for paths that lead straight to your front door. A good quality doormat is a simple but very effective fix.
Comparing Self Binding Gravel With Other Path Materials
To really see where self binding gravel fits in, it helps to put it side-by-side with the other popular options. Every material has its place, and the best choice depends entirely on your priorities—be it budget, appearance, accessibility, or maintenance.
| Feature | Self Binding Gravel | Loose Gravel | Resin-Bound | Tarmac |
|---|---|---|---|---|
| Aesthetics | Natural, organic, rustic finish in earthy tones. | Very natural and classic, but can look untidy. | Modern, smooth, uniform. Wide colour choice. | Utilitarian, flat, black/dark grey finish. |
| Stability & Accessibility | Firm and stable. Good for wheels and walking. | Unstable. Difficult for wheelchairs, pushchairs. | Very firm and smooth. Excellent accessibility. | Very firm and smooth. Excellent accessibility. |
| Permeability | Semi-permeable. Good for drainage (SuDS compliant). | Highly permeable. Excellent drainage. | Fully permeable when laid on a porous sub-base. | Impermeable. Requires planned drainage channels. |
| Installation Cost | Moderate. Lower than resin or tarmac. | Low. The cheapest option to lay. | High. Requires specialist installation. | High. Requires specialist equipment and labour. |
| Maintenance | Low to moderate. Occasional sweeping, weeding & top-ups. | High. Regular raking, weeding, and topping up needed. | Very Low. Needs sweeping and occasional power washing. | Low. May need crack repairs over time. |
| Durability | Good, but can be prone to wear in high-traffic spots. | Prone to spreading and developing bare patches. | Very durable and hard-wearing. Resists weeds. | Very durable, especially for vehicle traffic. |
This table shows that self binding gravel strikes a fantastic balance. It offers a more stable and accessible surface than loose stone, with a more natural feel and lower cost than resin-bound or tarmac options. It’s a brilliant middle-ground that delivers on both form and function for many projects.
How to Install a Self Binding Gravel Path
Getting a self binding gravel path right is all about the installation. While the material itself is quite forgiving, the secret to a professional, long-lasting finish lies in getting the groundwork absolutely spot on. This guide will walk you through the whole process, from that first spadeful of soil to the final compaction, ensuring your new path can stand up to years of use and the lovely British weather.
This simple visual breaks down the key benefits you get when you lay a self binding gravel path correctly.
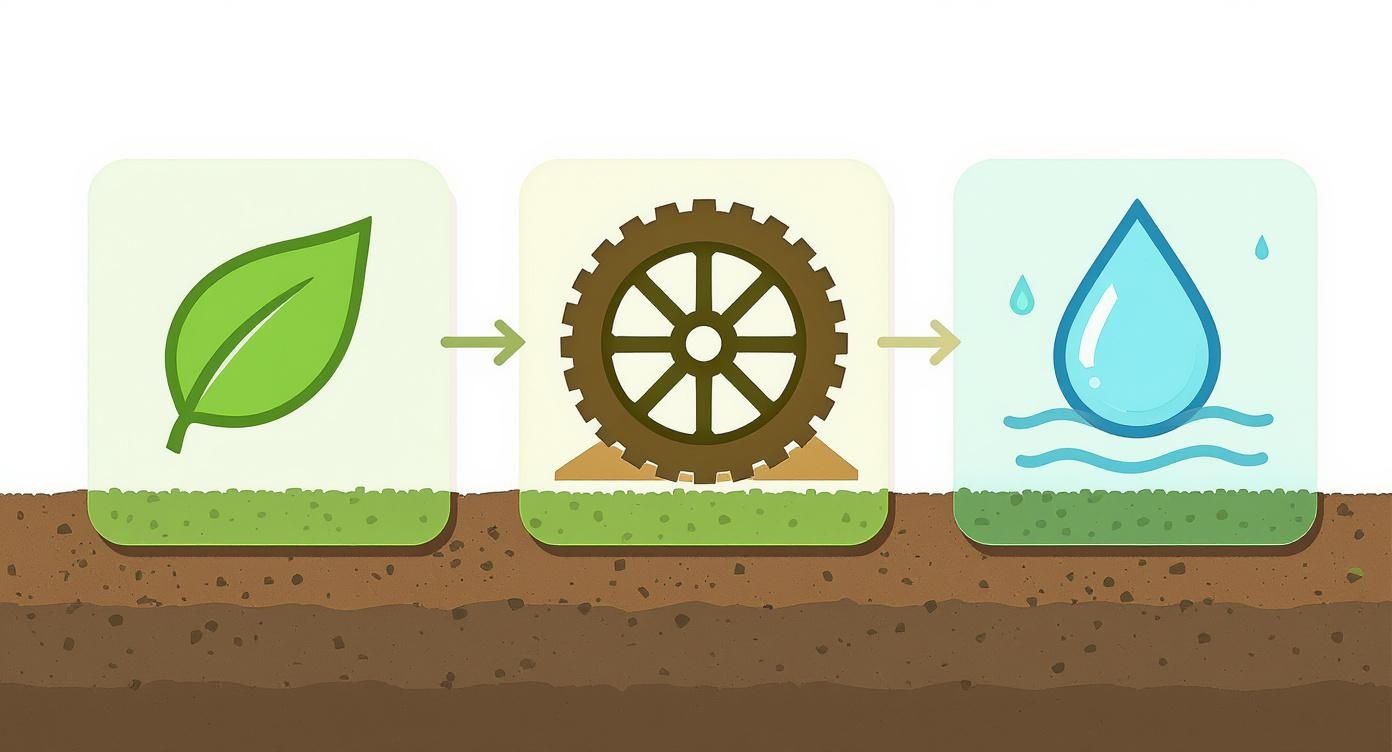
As you can see, the end result is a surface that not only looks natural and feels firm underfoot but also does a great job of managing rainwater.
Step 1: Prepare Your Foundations
Like any good project, success starts from the ground up. The first job is to mark out the area for your new path with some stakes and string. Once you're happy with the layout, it's time to get digging.
You’ll need to excavate deep enough to accommodate both the sub-base and the gravel top layer. A good rule of thumb is a depth of around 150mm (6 inches) for a footpath. If you're creating a light-use driveway that might see the odd car, you'll want to go deeper—aim for 200-250mm (8-10 inches).
It's vital to get rid of all the turf, weeds, roots, and any big stones during this stage. This stops anything from growing back through your finished path and gives you a clean, stable foundation to build on.
Step 2: Build a Robust Sub-Base
The sub-base is arguably the most critical part of the whole job. It provides the structural backbone, load-bearing strength, and essential drainage your path needs to survive. Without a solid sub-base, your gravel surface will almost certainly sink, shift, or become a soggy mess.
The gold standard for this is MOT Type 1 aggregate. This is a specific mix of crushed stone, usually from 40mm down to dust, that compacts brilliantly to form a hard, stable layer that water can still drain through. You can learn more about what makes MOT Type 1 aggregate so effective in our dedicated guide.
Lay the sub-base material into your excavated area to a depth of at least 100mm for paths or 150mm for driveways. Spread it out evenly, then get a whacker plate (compactor) on it. Compact it down until it’s completely firm and level – you should be able to walk on it without leaving much of an impression.
Step 3: Install Solid Edging
While you could skip this step, installing edging is something we highly recommend. It does two key things: it gives your path a crisp, clean finish and, more importantly, it holds the gravel in place, stopping it from spreading out or crumbling at the edges.
You’ve got plenty of options for edging materials, each giving a different look:
- Timber Sleepers: Great for a rustic, chunky border.
- Metal Edging: Offers a sharp, modern, and almost invisible line.
- Paving Slabs or Bricks: Create a classic and very sturdy frame.
Whatever you pick, make sure it’s installed securely (bedded into concrete if needed) and set to the right height. The top of the edging should sit just a little higher than the final compacted gravel level to keep everything neatly contained.
Step 4: Lay the Self Binding Gravel
Now for the main event! The trick to laying self binding path gravel is to do it in thin, manageable layers, not all in one go. This is the only way to make sure it compacts evenly right through its depth.
Start by spreading an even layer of gravel over your compacted sub-base, aiming for a loose depth of about 75mm. This will compact down nicely to the recommended finished depth of around 50mm. Use the back of a rake to get it level; using the pointy end can drag the larger stones away from the fine particles, which you don't want.
Top Tip: Try to create a very slight 'camber' or crown on your path, making the centre a tiny bit higher than the edges. This gentle slope—a fall of about 1 in 50 is ideal—encourages rainwater to run off to the sides instead of sitting on the surface, which is key for a long life.
Step 5: Water and Compact for a Perfect Finish
This is where the 'self-binding' magic really happens. The fine particles in the mix need a bit of water to activate their binding properties. Lightly spray the surface with a hose (using a fine rose attachment) until the gravel is damp all the way through, but not soaking wet.
Straight after watering, it's time to compact. A vibrating roller is the best tool for the job, but a whacker plate will also do the trick. Start compacting from the edges and slowly work your way into the middle. You'll see the fine particles rise to the top, creating that smooth, tightly-knit finish you're after.
If the gravel starts sticking to your roller or plate, it’s just telling you it's a bit thirsty. Give it another light spray and carry on compacting. You'll need to make several passes over the whole area until the path feels completely solid underfoot.
Finally, just let it be. The surface needs to dry and cure fully, which could take a few hours or a couple of days depending on the weather. Avoid walking on it during this time to let the bond strengthen properly, and soon you'll have a beautiful and durable self binding gravel path.
Calculating Your Gravel and Sub-Base Needs

Getting your quantities right is probably the single biggest hurdle in any landscaping project. It’s an easy mistake to make, but miscalculating how much material you need can be a real headache. Order too little, and you’re facing frustrating delays and shelling out for extra delivery charges. Order too much, and you're left with a mountain of aggregate you don't need and money down the drain.
Thankfully, working out what you need for both your sub-base and your self-binding gravel is pretty straightforward. You don’t need to be a maths whizz – just a simple formula and a tape measure.
The key is to work out the volume of the area you need to fill. You can get this with a basic calculation:
Path Length (in metres) x Path Width (in metres) x Depth (in metres) = Volume (in cubic metres)
This simple sum works for both your sub-base layer and your top gravel layer. Just make sure you do a separate calculation for each one, as they will almost certainly be laid at different depths.
A Practical Calculation Example
Let's walk through a real-world scenario. Imagine you're putting in a simple garden path that’s 10 metres long and 1.2 metres wide.
You've decided on a solid 100mm (which is 0.1m) deep sub-base using MOT Type 1, topped with a finished, compacted layer of 50mm (0.05m) of self-binding gravel.
Here’s how the maths pans out:
- Sub-Base Calculation: 10m (Length) x 1.2m (Width) x 0.1m (Depth) = 1.2 cubic metres (m³) of MOT Type 1.
- Gravel Calculation: 10m (Length) x 1.2m (Width) x 0.05m (Depth) = 0.6 cubic metres (m³) of self-binding gravel.
Easy, right? Now you have the volume, but aggregates are almost always sold by weight in tonnes. The conversion from volume to weight depends on the specific material's density, but a good rule of thumb is that one cubic metre of compacted aggregate weighs somewhere between 1.8 to 2.0 tonnes. For a bit more detail on this, our article exploring how much space one tonne of sand occupies offers some useful insights.
Getting the Depth Right for Your Project
The depth you need isn't a one-size-fits-all number; it's all about what you'll be using the surface for. Getting this right is crucial if you want your path to last and stay stable for years to come.
- Garden Footpaths (Light foot traffic): A compacted gravel depth of 40-50mm sitting on a 100mm sub-base is more than enough.
- Cycle Paths & Wheelchair Access (Regular wheeled use): For this kind of regular use, it's wise to go a bit thicker. Aim for a 50-75mm gravel layer on a 100-150mm sub-base for that extra resilience.
- Light Domestic Driveways (Occasional car use): Here, you need to seriously ramp up the strength. You should be using at least 100mm of gravel on a very robust sub-base of 150-200mm.
Don't forget to account for compaction! Self-binding gravel will compact down by about a third as you roll it. This means to get a finished, solid depth of 50mm, you'll need to lay it loose to a depth of around 75mm first. Always double-check the supplier’s specific recommendations.
Working with a supplier who can handle the whole process makes life so much easier. Here at The Waste Group, we don’t just deliver your aggregates. We can help you calculate the precise quantities you need and even coordinate the delivery with other services, like a grab hire lorry to take away the soil you’ve excavated. It’s this joined-up approach that helps your project run smoothly from start to finish.
Keeping Your Self Binding Gravel Looking Its Best
A beautiful self binding gravel path is a fantastic, long-lasting feature for any garden. The good news? Keeping it in top-notch condition is surprisingly straightforward and doesn't require a mountain of effort. A little regular care is all it takes to maintain that smart, professional finish for years to come.

Your number one job is to keep the surface clear of organic bits and pieces. Fallen leaves, grass clippings, and mud might seem harmless, but as they break down, they create a perfect little layer of compost for weeds to set up camp. A regular sweep with a stiff brush, especially during autumn, will stop this from happening and prevent weeds from ever getting a foothold.
Routine Checks and Quick Fixes
It’s a great habit to walk your path every few weeks, just to spot any small issues before they grow into bigger headaches. Keep a close eye on the areas that see the most footfall or where puddles tend to form after a downpour.
Here are a few common tasks you can easily tick off:
- Weeding: If a few determined weeds do pop up, simply pull them out by hand. Steer clear of harsh chemical weed killers or de-icing salts, as these can mess with the binding agents in the gravel and ruin the surface.
- A Light Rake: During long, dry spells, the very top layer can sometimes feel a bit loose. A quick, light rake over the surface will help redistribute the fine particles and bring back that firm, uniform look.
- Topping Up: Over the years, you might find some high-traffic spots looking a little thin. Keeping a small bag of your original gravel aside is the perfect solution for topping up these areas as needed.
Think consistency, not intensity. A ten-minute sweep once a week is far more effective than an hour of hard graft once a month. This little-and-often approach is the secret to keeping your self binding gravel path looking pristine.
How to Fix Small Potholes
Every now and then, a small pothole might appear, usually after a heavy knock or if an area becomes waterlogged. Don't worry, patching it up is a simple and satisfying job that will have your path looking as good as new in no time.
- Break It Up: Grab a hard-tined rake and really get stuck in, breaking up the compacted gravel inside and around the pothole. You want to loosen the material to a depth of about 25mm (1 inch).
- Add New Gravel: Sprinkle a small amount of fresh self binding gravel into the loosened patch. Add just enough so it sits slightly higher than the surrounding path.
- A Little Water: Give the area a gentle spray with a hose. This light watering is crucial as it activates the binding fines in both the old and new material, which is what creates a solid repair.
- Compact It Down: Firmly tamp the patch down using the back of a spade, a hand tamper, or even the heel of a sturdy boot. Keep going until it’s perfectly level with the rest of the path, creating a seamless and tough-as-nails fix.
Your Self Binding Gravel Questions Answered
Even after going through a detailed guide, a few specific questions always seem to pop up when people are planning a project. It’s completely normal. This final section tackles the most common queries we hear, giving you quick, clear answers to help you get started with confidence.
Is Self Binding Gravel Permeable?
Yes, but it's better to think of it as semi-permeable. A properly laid self-binding path lets a good amount of rainwater soak through the surface and into the sub-base beneath. This is a huge environmental plus, as it helps cut down on surface water runoff and lets groundwater recharge naturally.
The key word here, though, is properly. Its permeability is only as good as its installation. You absolutely need a free-draining sub-base, like MOT Type 1, and you must be careful not to over-compact the surface, which can effectively seal it up.
How Long Does a Self Binding Path Last?
If you get the installation right and give it a bit of basic care, there's no reason a self-binding gravel path shouldn't last for 10 years or more. The two things that really determine its lifespan are the quality of the sub-base and how well it drains.
A solid, well-compacted sub-base is your foundation for success – it stops the path from sinking or shifting over time. Good drainage, often just a slight camber or slope, prevents water from sitting on the surface where it can soften and weaken the finish. A regular sweep to clear off leaves and debris helps too.
Can You Use Self Binding Gravel on a Slope?
You can, but you need to be smart about it. Self-binding gravel works well on gentle slopes, but you don't want to push it much past a gradient of 1 in 15 (which is about a 6.7% incline). Anything steeper and you run the risk of heavy rain washing away the fine particles that hold it all together, leading to erosion and a ruined path.
If you are laying on a slope, here’s how to give yourself the best chance of success:
- Install Water Bars: These are small, subtle channels or humps built across the path. They act like little dams, directing water off to the sides before it can build up speed.
- Use Robust Edging: This is non-negotiable on a slope. Strong, well-secured edging is vital to keep the material contained and stop it from washing away at the sides.
- Be Meticulous with Compaction: Every square inch needs to be thoroughly compacted to create the toughest, most resilient surface possible.
What Is the Best Edging for a Gravel Path?
The "best" edging really comes down to the look you're after, but some materials definitely offer more strength than others. For a self-binding path gravel project, strong and secure edging isn't just a nice-to-have; it's essential for holding the whole structure together.
Some popular and effective choices include:
- Steel Edging: Gives you a very strong, clean, and modern look that’s surprisingly discreet.
- Timber Sleepers: Perfect for a rustic, country-garden feel, offering a chunky and robust frame.
- Paving Bricks or Setts: A classic choice that creates a durable, traditional border. For ultimate stability, you can bed them in concrete.
Is It a Good Choice for Prestigious Projects?
Absolutely. Self-binding gravel is often the go-to surface for many high-end public and private landscaping projects across the UK. Its natural look combined with a firm, stable finish makes it incredibly versatile. One of the most famous examples is Breedon Golden Amber Gravel, which even holds a Royal Warrant and has been used at royal households and countless National Trust properties. For instance, Oxford Botanic Garden laid over 3,000 square metres of it during a major renovation. You can learn more about its use in heritage locations here.
The fact that it's trusted in so many high-profile locations really speaks volumes. It's seen as a premium, reliable, and beautiful surfacing material that works just as well in historic settings as it does in modern landscapes.
Ready to get your project off the ground? From figuring out how much aggregate you need to arranging delivery and clearing the waste afterwards, The Waste Group offers a complete solution to make your landscaping project a success. Explore our aggregate supply and waste management services today!